
Home gym flooring is the surface, or stack of layers, between training equipment and the structural floor. It protects the slab or joists from dropped weights, keeps racks and benches steady, and gives the feet reliable grip. Weights reach the floor often. A national study counted more than 970,000 weight training injuries treated in US emergency departments between 1990 and 2007. Weights dropping on a person caused 65 percent of them1. This hub maps the whole topic and routes to deeper guides on each part.

Quick Answer
What is the best home gym flooring?
For most home gyms, the best flooring is dense rubber, laid as mats, tiles, or rolls over a dry, level subfloor. Lifting areas need thicker rubber or a platform, while cardio and mobility zones can use thinner, firmer surfaces. Basements and garages need a slab moisture check first. Then match thickness to the heaviest weight that will be dropped, and cover the room in zones or wall to wall.
Key Takeaways
- Flooring decisions start below the surface, with the slab or joists, their moisture, and the load they carry.
- Dense rubber is the default for strength training; foam, vinyl, turf, cork, and sprung floors suit narrower uses.
- Thickness follows the heaviest drop, and a layered platform spreads barbell impact wider than rubber alone.
- Zone coverage protects the floor under equipment and impact areas at a lower cost than full-room coverage.
- The most common misconception: thicker always means better. A soft, thick mat can let racks and benches rock.
Home Gym Flooring in 30 Seconds
| If you are… | Do this |
|---|---|
| Lifting with bumper plates | Use thick rubber or a layered platform in the drop zone |
| Training in a basement or garage | Test the slab for moisture before laying any flooring |
| Mostly doing cardio and bodyweight work | Use a firm rubber or tile surface, or an equipment mat under each machine |
| Building a gym upstairs or over joists | Check floor load and spread point loads before adding a heavy rack |
| Working with carpet you cannot remove | Build a rigid base layer before the rubber goes down |
| On a tight budget | Cover the lifting and machine zones first, then expand |
What Is Home Gym Flooring?
Home gym flooring refers to the surface, and any layers beneath it, that sits between training equipment and the structural floor. In most homes that structural floor is a concrete slab or a wood subfloor over joists. Flooring has three jobs: protect that structure, keep equipment stable, and give the feet steady traction. A good floor does all three for the training actually done in the room.
A subfloor is the structural layer under the finished surface, such as a concrete slab, plywood over joists, or an existing floor covering. Its condition shapes much of the flooring plan. A damp slab needs a moisture check before anything covers it. A carpeted or springy floor needs a rigid base so racks and benches do not sink or rock.
Rubber gym flooring means dense recycled or virgin rubber sold as mats, interlocking or straight-edge tiles, or rolls. It is the default for strength training because it absorbs impact without feeling soft underfoot. Foam, vinyl, turf, cork, and sprung floors each fit narrower uses, such as mobility work, cardio, sled pushes, or repeated jumping. A lifting platform is a raised, layered pad, usually wood plus rubber, that spreads the impact of a dropped barbell over a wider area.
The topic covers subfloors and moisture, materials and formats, thickness and platforms, equipment zones, workout fit, and installation. It excludes structural repairs, waterproofing systems, and floor reinforcement. Those decisions belong to a structural engineer or a waterproofing contractor.
Why Home Gym Flooring Matters
Home gym flooring matters because dropped weights, sliding equipment, and damp slabs damage floors and people in different ways. Free weights were involved in 90 percent of the weight training injuries in the national emergency department study1. Plates, dumbbells, and kettlebells all reach the floor, sometimes on purpose and sometimes not. The flooring decides whether that contact cracks tile, dents wood, or lands on a surface built for it.
Traction and flat seams matter as well. A Journal of Strength and Conditioning Research analysis covered 15,348 patients aged 14 to 35 treated for resistance training injuries. Falls caused 8.3 percent of injuries among women and 5.6 percent among men2. Curling mat edges, gaps between tiles, and loose equipment mats are trip points that a well-installed floor removes.
A flat floor keeps paying off as a household ages. The CDC reports that over 14 million, or 1 in 4 older adults, report falling every year3. A gym floor that stays level, with trimmed edges at the doorway, is one less hazard in the house.
Moisture is the hidden risk under basement and garage floors. Rubber and foam can hold damp air against a slab, which leads to odor and mold. EPA guidance on mold sets a clear humidity target:
If possible, keep indoor humidity below 60 percent (ideally between 30 and 50 percent) relative humidity.
The same EPA guide says that when wet materials are dried 24-48 hours after a leak or spill, mold will not grow in most cases4. Water that seeps under rubber flooring rarely dries that fast, so a dry slab comes before any flooring decision.
Heavy equipment also adds weight the structure must carry. Under the federal standard for manufactured homes, attic floor areas used as living space must resist a minimum design live load of 40 pounds per square foot5. That figure is a design reference, not a rating for any house. A loaded rack concentrates weight on a few small feet, so a structural engineer should review heavy setups on upper floors.
The Base-to-Surface Flooring Framework
The Base-to-Surface Flooring Framework splits home gym flooring into six parts. The first three run from the bottom up: check the subfloor, choose the material, then set thickness and platforms. The last three fit that floor to the room: plan equipment zones, match the surface to each workout, and install it well.
Subfloor, Moisture, and Load
Point load means weight concentrated on a small contact area, such as rack feet, a loaded plate tree, or the base of a weight-stack machine. Every flooring plan starts below the surface. Concrete needs a moisture check, because a damp slab under rubber can cause odor and mold. Basements add cold and seepage, while garages add temperature swings, oil stains, and uneven pours. Joist floors need attention to total equipment weight and point loads, which a structural engineer should assess for heavy setups. Carpet needs a rigid layer, such as plywood, before rubber goes on top, or racks and benches will sink.
The subfloor sets the limits, so the flooring choice comes after the slab or joists are checked.
Deeper read: Best Home Gym Flooring Over Concrete.
Deeper read: Basement Gym Flooring for Cold, Damp Concrete: A Layer-by-Layer Comparison.
Deeper read: Garage Gym Flooring for Concrete, Moisture, and Heavy Lifts.
Deeper read: Can Your Floor Support a Weight Set for Home Gym Use? Load Limits Explained.
Deeper read: Gym Flooring Over Carpet: How to Build a Stable Base.
Materials and Formats
Horse stall mats are thick, heavy rubber mats made for barns that many lifters adopt for home gyms. They are tough and low in cost, but rubber quality, odor, and edge squareness vary from batch to batch. Rubber also comes as tiles and rolls. Tiles suit odd room shapes and allow a single damaged tile to be replaced. Rolls cover large areas with fewer seams. Vinyl suits cardio and light training but dents under racks and dropped weights. Sprung floors help dance, aerobics, and repeated jumping, yet feel too soft for heavy lifting. Cost depends on material, thickness, room size, and whether the install is DIY.
Rubber is the default for strength work; other materials earn a place only where their strengths match the training.
Deeper read: Best Home Gym Flooring: Materials, Thickness, and Use.
Deeper read: Rubber Rolls vs Mats vs Tiles for Home Gym Flooring.
Deeper read: Rubber Flooring Tiles for Home Gyms: Are They Right for You?
Deeper read: Horse Stall Mats for Home Gyms: Pros, Cons, and Safety.
Deeper read: Can You Use Vinyl Flooring in a Home Gym?
Deeper read: Home Gym Flooring Cost by Material and Room Size.
Thickness, Impact, and Platforms
Mat density refers to how much rubber is packed into a given volume, and it matters as much as thickness. A dense mat spreads load and resists denting, while a light, spongy mat can let a rack rock. Thickness should rise with drop height and plate weight. Bumper plates dropped from overhead need more protection than dumbbells set down after a set. Deadlift mats cover only the landing zone. Olympic lifting platforms combine wood and rubber to spread impact wider than rubber alone. A home-built platform protects concrete well when its layers are glued, fastened, and flat.
Thickness is matched to the heaviest drop, not to the average workout.
Deeper read: Rubber Gym Mats: What Thickness Does Your Home Gym Need?
Deeper read: Rubber Mat Flooring for Heavy Home Gym Loads.
Deeper read: Best Flooring for Bumper Plates and Dropped Weights.
Deeper read: Deadlift Mats: Thickness, Size, and Floor Protection.
Deeper read: Olympic Weightlifting Platforms: Size, Layers, and Flooring.
Deeper read: How to Build a Weightlifting Platform for a Home Gym.
Deeper read: How to Build a Deadlift Platform That Protects Concrete.
Equipment Zones and Coverage
Zone coverage means placing gym flooring only where equipment and impact happen, rather than wall to wall. It costs less and leaves the rest of the room usable. Weight-stack machines need a firm base that stops rocking and spreads their concentrated load. Bench feet need a surface firm enough that they do not sink. Equipment mats under a treadmill, bike, or rower are often enough in a cardio-only room. Cable machines and racks may need stabilizing with bolts, a platform, or non-permanent weight. Full-room coverage makes sense once several zones start to touch.
An equipment mat protects one footprint; full-room flooring protects the whole training area.
Deeper read: Home Gym Floor Mats: Full-Room vs Equipment Zones.
Deeper read: Home Gym Equipment Mats: When Are They Enough?
Deeper read: Floor Protection Under Weight-Stack Machines.
Deeper read: Flooring Under a Weight Bench: Stability and Protection.
Deeper read: How to Anchor a Pulley System for Home Gym Use Without Damaging the Floor.
Flooring by Workout Type
Shock absorption is the share of impact a floor soaks up instead of passing it to the subfloor or the body. Different workouts need different amounts. Heavy lifting wants firm rubber that stays put under racks. HIIT and plyometrics want some give for landings. Yoga and mobility work want a warmer, smoother surface. Kettlebell training needs grip for swings and protection for an accidental drop. A CrossFit-style room blends all of these, with firm lifting zones, an impact area for jumps, and open lanes for rowing or sled work. Sprung floors fit only rooms built around repeated jumping.
The floor should suit the most demanding movement done on it, then adapt by zone for the rest.
Deeper read: Best Exercise Flooring for Every Home Gym Workout.
Deeper read: Best Flooring for Kettlebell Training at Home.
Deeper read: Best Flooring for a CrossFit-Style Home Gym.
Deeper read: Is Sprung Flooring Worth It for a Home Gym?
Installation and Layout
Acclimation means letting rubber flooring rest in the room before cutting, so it settles to the room’s temperature and lies flat. Installation starts with a clean, level, dry subfloor. The layout keeps seams away from the main lifting zone and puts cut pieces against the walls. Rubber cuts best with a sharp utility knife and a straightedge, using several light passes. Rolls may need double-sided tape or adhesive at the seams, while tiles interlock or butt together. Edges at doorways need beveled trim so they do not become a trip point.
Most flooring problems trace back to rushed preparation, not to the material itself.
Deeper read: How to Install Home Gym Flooring Step by Step.
Deeper read: How to Install Rubber Flooring in a Home Gym.
Deeper read: How to Install Rubber Flooring Rolls in a Home Gym.
How to Choose Home Gym Flooring
The most important decision criterion is the heaviest load the floor will take, whether from a dropped barbell or a loaded rack. That load sets the material, the thickness, and whether a platform is needed.
- Check the subfloor for moisture, level, and load, starting with flooring over concrete or floor load limits.
- List every workout planned for the room and pick the most demanding one, using exercise flooring by workout.
- Choose a material and format by comparing rubber rolls, mats, and tiles.
- Set thickness by the heaviest drop with rubber gym mat thickness guidance.
- Decide between zone coverage and full-room coverage, then plan seams away from the lifting area.
- Price the plan for the room size with flooring cost by material.
| Criterion | What to check | Red flag |
|---|---|---|
| Subfloor | Dry, level slab or stiff joist floor | Damp patches, efflorescence, or a bouncy floor |
| Material | Dense rubber for lifting zones | Soft foam under a rack or bench |
| Thickness | Matched to drop height and plate weight | Thin mats under overhead lifts |
| Stability | Equipment stays level and does not rock | Bench feet sinking into the surface |
| Seams and edges | Tight seams and beveled doorway edges | Curling corners or gaps between tiles |
| Odor and ventilation | Low-odor rubber in a ventilated room | Strong smell that lingers for weeks |
Two red flags apply to every room. A floor that only feels stable once the equipment is pushed into a corner is too soft for that equipment. A plan that needs a reinforced floor, a waterproofing system, or bolts into a slab with radiant heat needs a structural engineer or qualified installer. That work sits outside this guide.
Compare All Home Gym Flooring Decisions
| Decision area | Core question | Main input | Common mistake | Professional hand-off |
|---|---|---|---|---|
| Subfloor, moisture, and load | Can the base carry the gym and stay dry? | Moisture test, floor type, equipment weight | Covering a damp slab | Structural engineer or waterproofing contractor |
| Materials and formats | Which surface suits the training? | Workout mix, room shape, budget | Choosing vinyl or foam for heavy lifting | None for selection |
| Thickness and platforms | How much impact must the floor absorb? | Drop height, plate type, subfloor | Buying by price instead of drop height | None for standard builds |
| Equipment zones | Where does flooring need to go? | Equipment footprints and impact areas | Mats too small for the equipment | Installer for anchoring hardware |
| Workout type | How firm or cushioned should it feel? | Most demanding movement in the room | One surface for every workout | None |
| Installation | Will the finished floor lie flat? | Subfloor prep, acclimation, seam plan | Cutting before the rubber settles | Flooring installer for adhesives on large rooms |
Common Home Gym Flooring Mistakes
Mistake 1: Laying Flooring Over an Untested Slab
Why it is a mistake: Rubber laid over a damp slab holds moisture underneath it. Odor, mold, and a slippery film can follow, and the problem stays hidden until the mats are lifted.
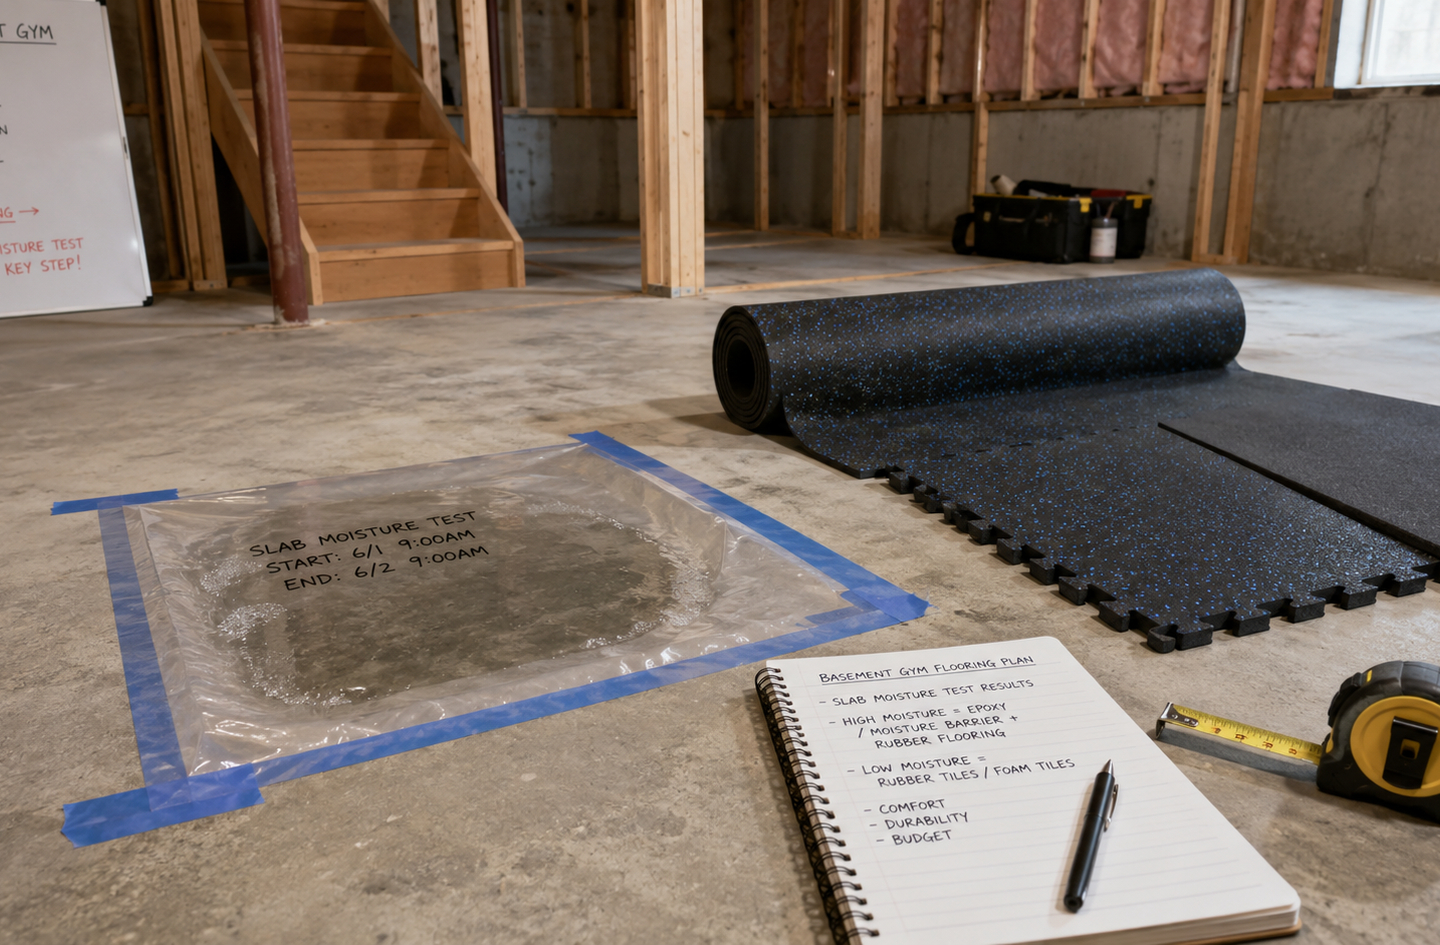
What to do instead: Tape a plastic sheet to the slab for a few days or use a moisture meter. Fix drainage and humidity before any flooring goes down.
Read more: Basement Gym Flooring for Cold, Damp Concrete: A Layer-by-Layer Comparison.
Mistake 2: Choosing Thickness by Price Instead of Drop Height
Why it is a mistake: Thin mats look like a bargain until a loaded barbell lands on them. Impact then passes straight to the slab or joists, and the noise travels through the house.
What to do instead: Size thickness to the heaviest planned drop. Use a platform or extra layers in the drop zone and thinner rubber elsewhere.
Read more: Best Flooring for Bumper Plates and Dropped Weights.
Mistake 3: Using Soft Foam Under Heavy Equipment
Why it is a mistake: Foam tiles feel comfortable, but rack feet, bench legs, and machine bases press into them. The equipment rocks, the foam tears, and the subfloor gets little protection.
What to do instead: Put dense rubber under racks, benches, and weight-stack machines. Keep foam for mobility and bodyweight areas.
Read more: Rubber Mat Flooring for Heavy Home Gym Loads.
Mistake 4: Rushing Seams, Edges, and Acclimation
Why it is a mistake: Rubber cut straight from the box can shrink or curl as it settles. Gaps open at the seams and corners lift, which creates the trip points the floor was meant to remove.
What to do instead: Let the rubber rest in the room first, dry-fit the whole layout, and cut last. Secure seams and bevel doorway edges.
Read more: How to Install Rubber Flooring in a Home Gym.
Best Home Gym Flooring by Room Type
Best for Basement and Garage Gyms
Basement and garage gyms sit on concrete, so moisture and temperature drive the flooring choice. Basements tend to be cold and damp, and the slab may seep after heavy rain. A dehumidifier, a moisture test, and sometimes a vapor barrier come before the rubber. Garages swing between hot and cold, collect oil and road salt, and often have uneven pours or a drain slope. Rubber tiles or rolls handle these conditions well and can be lifted to clean beneath them. Any crack repair, drainage work, or waterproofing belongs to a qualified contractor.
Deeper read: Basement Gym Flooring for Cold, Damp Concrete: A Layer-by-Layer Comparison.
Deeper read: Garage Gym Flooring for Concrete, Moisture, and Heavy Lifts.
Best for Olympic Lifting and Dropped Weights
Rooms built for Olympic lifts, heavy deadlifts, or bumper plate drops need more than one layer of rubber. A platform pairs a stiff wood core with rubber landing strips, so impact spreads across a wide area before it reaches the slab. The lifter stands on wood for a stable, flat footing, while the plates land on rubber. A platform also defines the lifting zone, which keeps other equipment and walking traffic clear of the bar. Building one at home takes basic tools, a flat base, and careful fastening.
Deeper read: Olympic Weightlifting Platforms: Size, Layers, and Flooring.
Deeper read: How to Build a Deadlift Platform That Protects Concrete.
Best for Upstairs and Carpeted Rooms
Upstairs rooms and carpeted rooms share one problem: the base is not as rigid as a slab. On a joist floor, total equipment weight and point loads matter, so a heavy rack or machine deserves a structural review. Spreading load with a platform or wide mats helps, and placing heavy gear near a load-bearing wall is common practice. On carpet, a plywood or rigid tile layer stops racks and benches from sinking, and rubber goes on top. Dropping heavy weights upstairs is best avoided entirely.
Deeper read: Can Your Floor Support a Weight Set for Home Gym Use? Load Limits Explained.
Deeper read: Gym Flooring Over Carpet: How to Build a Stable Base.
Frequently Asked Questions
What thickness of rubber flooring does a home gym need?
The thickness a home gym needs depends on what lands on the floor. Cardio, bodyweight work, and dumbbells set down gently need only a thin, firm layer. Heavy deadlifts and bumper plates dropped from overhead need thicker rubber or a layered platform. Density matters as much as thickness, because a dense mat keeps racks level while a spongy one lets them rock. The subfloor also counts, since a joist floor needs more impact protection than a slab.
Do you need a vapor barrier under basement gym flooring?
A vapor barrier under basement gym flooring is needed when the slab shows moisture. A plastic sheet taped to the concrete for a few days, or a moisture meter, shows whether water vapor is coming through. EPA guidance advises keeping indoor humidity below 60 percent4, so a dehumidifier often helps too. Active leaks, standing water, or wet walls need drainage or waterproofing work first, which a qualified contractor should assess.
Are horse stall mats good for a home gym?
Horse stall mats can work well for a home gym, especially under racks and in lifting zones. They are dense, heavy, and tough, and they usually cost less than gym-branded rubber. The trade-offs are a strong rubber smell at first, edges that are not always square, and a weight that makes them hard to move. Airing them out before installing helps with odor. For full-room coverage, the seams between mats need careful fitting.
Can you put gym flooring over carpet?
Gym flooring can go over carpet, but carpet alone is too soft a base for heavy equipment. Low-pile carpet can take rubber tiles for light training. For racks, benches, or machines, a rigid layer such as plywood should go down first to spread the load and stop sinking. High-pile carpet makes this harder and may let the whole floor shift. Removing the carpet in the lifting zone is often the more stable option.
How This Guide Was Built
The methodology behind this guide follows the order a floor is planned: structure first, then surface, then the room around it. Figures come from an EPA mold guide, a federal construction standard, a children’s hospital research release, the CDC, and a peer-reviewed journal. Each one links to the page that carries it. Thickness and material guidance without such a source was written as qualitative advice. The six-part framework groups the topic’s flooring questions by layer. Oded Feigin holds editorial responsibility and reviews the guide when a source or recommendation changes.
What This Hub Does Not Cover
- Floor reinforcement, joist repair, or load ratings for a specific house – a structural engineer handles these.
- Waterproofing, drainage, or foundation crack repair – a waterproofing contractor should assess them.
- Radon testing and mitigation in basements, which a certified radon professional handles.
- Building code compliance for finished basements, garages, or additions, which local codes and inspectors govern.
- Medical or injury advice – a doctor or athletic trainer should guide any training program.
References
- Nationwide Children’s Hospital – national study of weight training injuries treated in US emergency departments
- Journal of Strength and Conditioning Research (PMC) – a 10-year analysis of resistance training injuries treated in emergency departments
- Centers for Disease Control and Prevention – older adult falls data and research
- US Environmental Protection Agency – a brief guide to mold, moisture, and your home
- 24 CFR 3280.305, Legal Information Institute – federal structural design requirements for manufactured homes
Next Read
Home gym flooring works best when it is planned from the base up. Check the subfloor, choose the material, set thickness for the heaviest drop, then fit it to the room. Thickness is where most buying decisions succeed or fail.