
Many home gym flooring failures start before the first mat goes down: a damp slab, a high spot under a seam, or rubber cut before it has relaxed. Installing gym flooring at home works best as a fixed sequence: moisture, flatness, acclimation, layout, cutting and edges. This guide follows that order for rubber rolls, tiles and stall mats. The home gym flooring overview places this job within the wider room plan. The order matters because the pieces are heavy, and a 4 by 6 foot stall mat weighs about 100 pounds1.
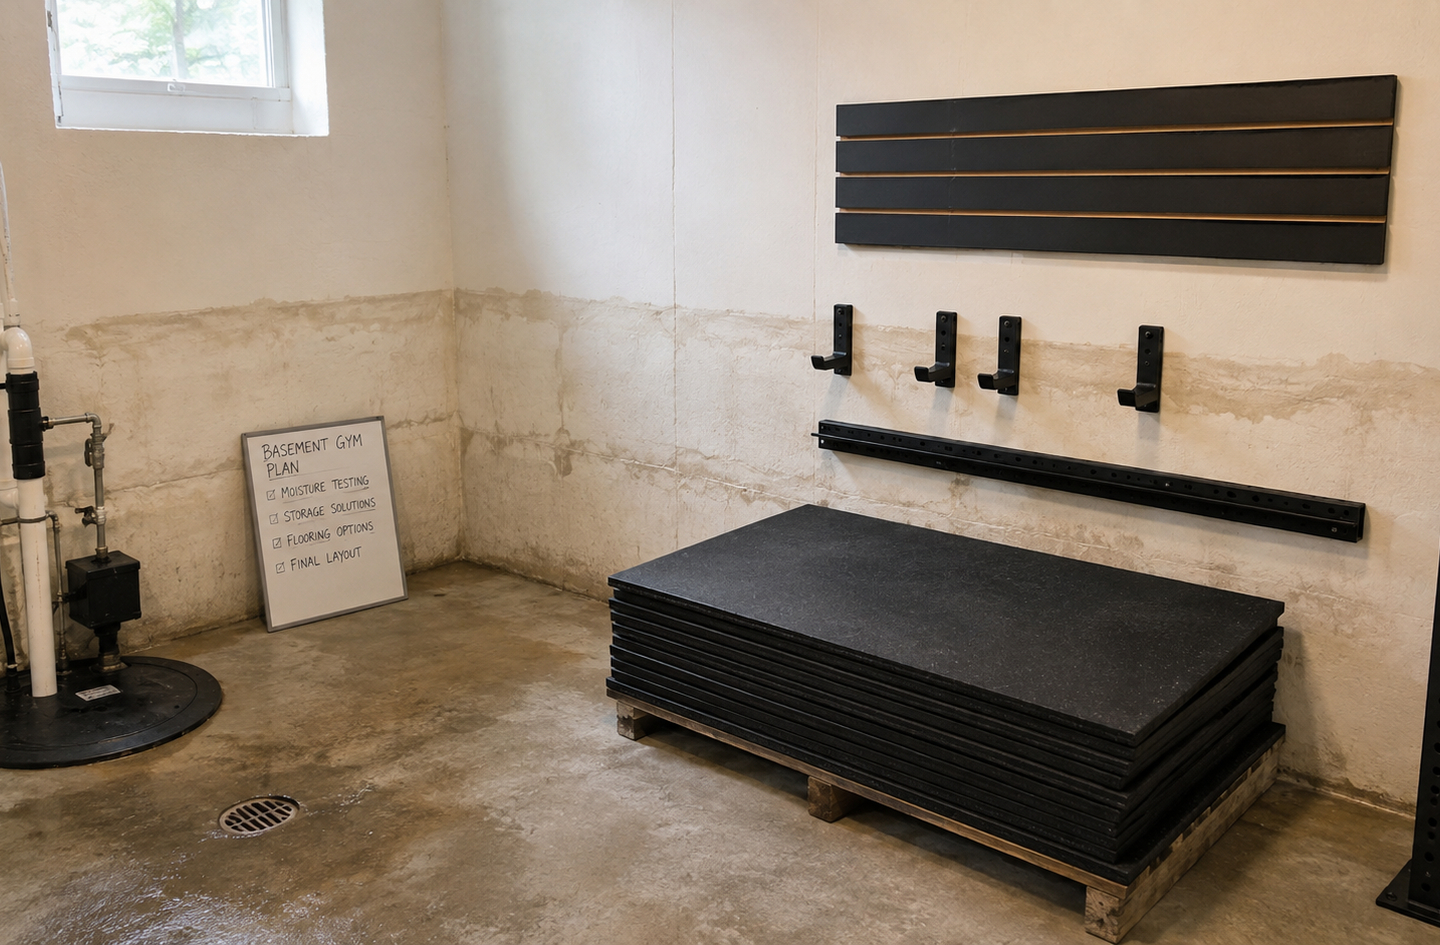
Quick Answer
How do you install home gym flooring?
Test the slab for moisture, clean and flatten the subfloor, and acclimate the rubber. Then snap a straight starting line, dry-fit and cut, tape or glue the seams, and give every exposed edge a beveled or ramped transition. One rubber-roll maker says the surface should be flat to 3/16 inch in 10 feet2, measured before any flooring goes down. Standing water, seepage or a soft floor goes to a licensed contractor before any flooring is laid.
Key Takeaways
- Moisture comes first: the EPA advises keeping indoor humidity, if possible, below 60 percent3. The 2021 IRC also exempts garages from the under-slab vapor retarder it requires for most other slabs4.
- One rubber-roll maker requires 48 hours of acclimation at room temperature before installation2. Rubber cut on delivery day can shrink away from or push up at its seams.
- A stall mat 3/4 inch thick1 has an edge taller than the 1/2 inch high maximum for a beveled change in level in the ADA Standards5. By that benchmark, which does not govern homes, an exposed walkway edge calls for a ramped transition.
- A 100 pound stall mat1 weighs roughly twice the 51 pound NIOSH load constant6, so every full mat is at least a two-person carry.
Before You Begin: Match Home Gym Flooring to the Room
The installation method depends on the product, because rolled rubber, interlocking tiles and stall mats share the same prepared base but differ in weight, seam count and fastening. The right flooring is the one the room can support, so the room decides before the catalog does.
Rolled rubber is recycled or virgin rubber flooring sold in long rolls, which leave few seams but must relax flat before final cuts. A stall mat is a solid, heavy rubber mat made for horse stalls and widely reused in home gyms. Penn State Extension reports that the most common stall mat thicknesses run from 1/2 to 3/4 inch1. Choosing that thickness is its own decision, covered in the guide to rubber gym mat thickness; this guide starts once the product is chosen.
| Rubber type | What the source states | What it changes in the install |
|---|---|---|
| Stall mats | A 4 by 6 foot mat weighs about 100 pounds; common thickness is 1/2 to 3/4 inch1 | Two-person handling; thick edges need a transition |
| Rolled rubber | Rolls are stretched in manufacturing and should relax for 24-48 hours after unrolling2 | Rough-cut long, trim after relaxing |
| Interlocking tiles | One maker lists a dimension tolerance of plus or minus one-eighth inch for its 23 inch interlocking tile2 | Dry-fit a full row before committing |
Gather the tools before day one. Layout needs a tape measure, chalk line, framing square and a metal straightedge or drywall T-square. Cutting and fixing need a utility knife with spare blades, gloves, and double-faced carpet tape or the maker’s adhesive. Prep needs a broom, a vacuum and a relative humidity meter. Plan on a helper for every full stall mat.
- Time: one weekend of work, plus the acclimation period before cutting.
- Difficulty: beginner to intermediate; concrete grinding and moisture repair are the hard parts.
Buy the flooring only after Steps 1 and 2 pass, because a slab that fails the moisture or flatness check changes what can go on it.
Step 1: Test and Manage Slab Moisture
Slab moisture is the first test, because rubber laid over damp concrete holds water against the slab and every later step assumes a dry base. Relative humidity is the amount of water vapor in the air compared with the most it can hold at that temperature. The EPA advises keeping indoor humidity below 60 percent, and ideally between 30 and 50 percent, where possible3.
“The key to mold control is moisture control.”3
U.S. Environmental Protection Agency (EPA)3
A vapor retarder is a plastic sheet placed under a concrete slab to slow ground moisture rising into it. The 2021 International Residential Code (IRC), as adopted in Utah, calls for a minimum 6-mil vapor retarder under slabs, with joints lapped not less than 6 inches4. It exempts garages4. A garage slab can therefore lack the sheet that the code requires under most other slabs, which makes the garage test more important, not less.
Concrete moisture is measured inside the slab, not in the room air. One rubber-roll maker requires relative humidity testing to ASTM F2170 and lists 85 percent as the limit for the adhesive normally selected2. A clear plastic square taped to the slab overnight is a quick screening check: darkened concrete or droplets underneath point to moisture that needs a proper test.
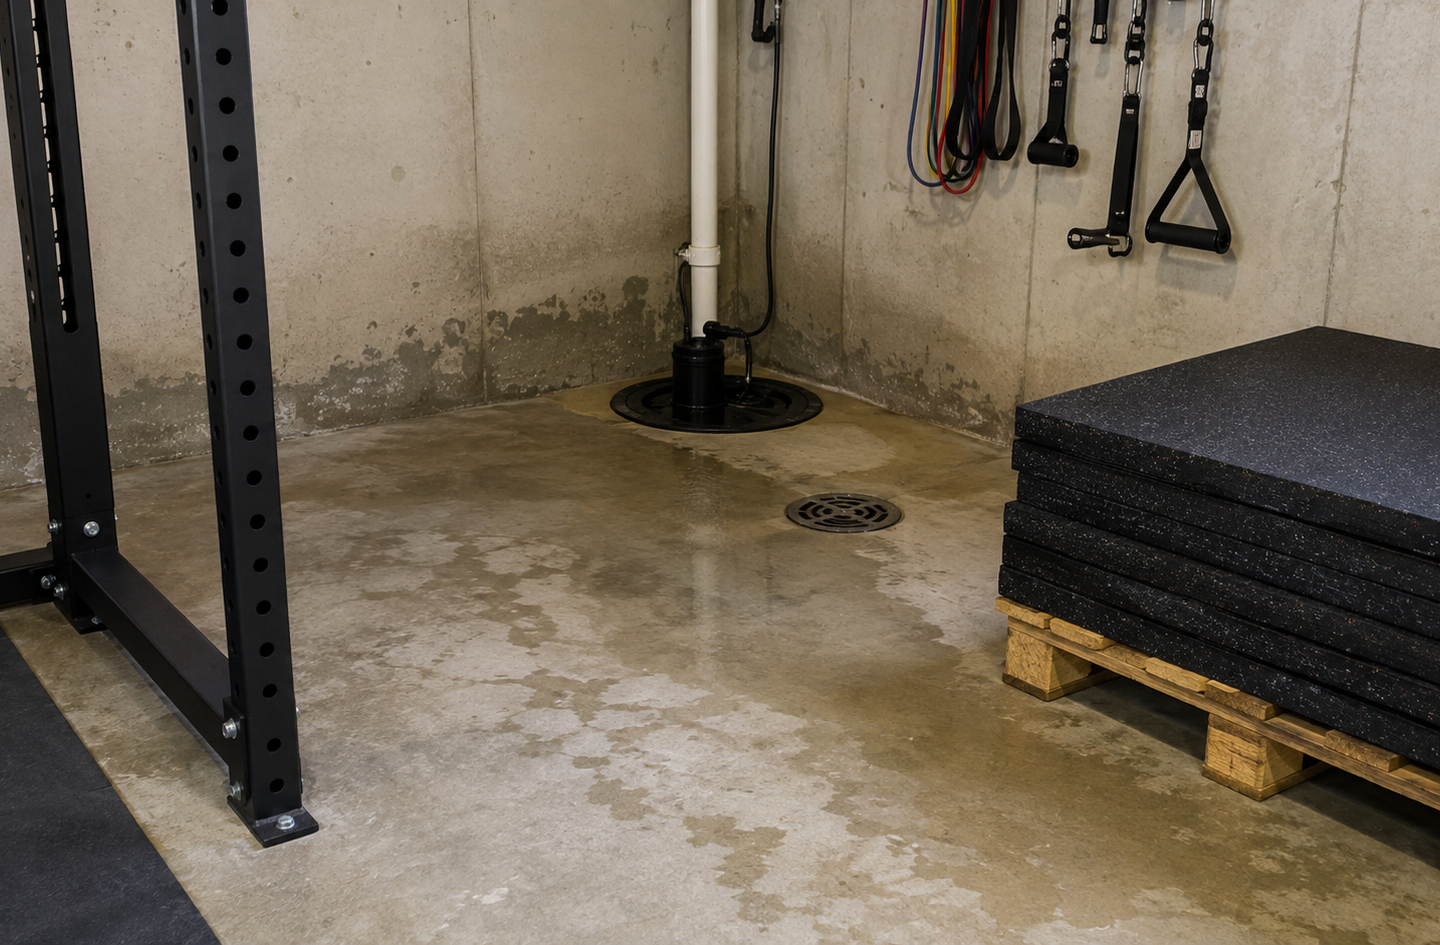
- Run a humidity meter in the room for several days, including after rain.
- Tape down plastic squares in the corners, near the drain and in the lifting area.
- Record readings and photos before ordering flooring.
Cold, below-grade slabs raise their own layer questions, which the comparison of basement gym flooring layers works through. Standing water, active seepage or white mineral deposits on the walls point to a drainage problem for a licensed contractor, not one a mat can hide.
If the slab fails the screening check, stop here: rubber over a wet slab tends to trap odor and moisture rather than fix them.
Step 2: Prepare a Flat, Clean Subfloor
A flat, clean subfloor matters because every bump, ridge and crack telegraphs through rubber as a raised seam or a rocking tile. Subfloor refers to the structural surface the flooring rests on: a concrete slab in most garages and basements, or wood panels over joists on upper floors.
The Iso-Step installation guide asks for a floor flat to 3/16 inch in 10 feet2. High spots are ground level, and low spots are filled with an approved Portland-based patching compound2. The same guide rejects gypsum-based patching compounds and calls for wood subfloors of double construction at least one inch thick2.
- Sweep and vacuum the slab, then scrape off old adhesive, paint and debris mechanically; the guide says not to use solvents.
- Slide a long straightedge across the floor in several directions and mark every gap and high point.
- Grind high spots, then fill low spots, cracks and saw-cut control joints with a Portland-based patch2.
- Leave true expansion joints open; the maker warns that flooring laid over one will likely fail there2.
- Let every patch dry fully before anything covers it.
Grinding concrete raises a health issue as well as a flatness one. The maker’s guide warns that respirable silica, classified by OSHA as a carcinogen, is known to cause silicosis2. Use a shroud with a vacuum and a fitted respirator, or hire the grinding out.
A slab that needs more than spot grinding and patching is a job for a concrete contractor, because thick leveling layers carry moisture and bonding rules of their own.
Step 3: Acclimate the Rubber Before Cutting
Rubber arrives slightly stretched and responds to room conditions, so it must settle in the room before any final cut. Acclimation is the period in which flooring sits unpacked in the room where it will be installed, until its size matches that room’s conditions.
The Iso-Step guide calls for a minimum uniform temperature of 65°F (18°C) for 48 hours before, during and after installation, and 48 hours of acclimation for material and adhesive2. It also says rolls are stretched slightly in manufacturing and should be unrolled to relax for 24-48 hours2. Rolls stored on end curl at the edges, and the guide calls for those curled edges to be cut straight2.
- Bring the rubber into the room and set the heating or cooling to normal training conditions.
- Unroll rolls flat; spread tiles and mats out in low stacks.
- Wait out the acclimation period before snapping lines or making final cuts.
An unheated garage in winter cannot hold that temperature, so the practical choices are a temporary heater or a milder week. Rubber cut tight while cold can push up into peaked seams as the room warms, and rubber cut before it relaxes can shrink back and open them.
Treat the acclimation wait as part of the job schedule, not a delay: it is the cheapest step in the whole installation.
Step 4: Plan Seams and Dry-Fit the Layout
Layout comes before cutting because the first straight line decides where every seam lands. The Iso-Step guide tells installers to assume the walls are not straight or square and to snap a chalk line as the starting edge2. It also calls for end seams to be staggered2.
Seams also decide how well the floor stays together. Penn State Extension notes that without a secure connection, smooth multi-piece stall mats can “walk” and work apart1. Home Gym Specs reads that as a layout rule: full pieces go under the rack and the lifting zone, and cut pieces go against the wall farthest from them.
Worked example, calculated from cited inputs: a 10 by 12 foot room covers 10 x 12 = 120 square feet. Each 4 by 6 foot stall mat1 covers 4 x 6 = 24 square feet, so 120 / 24 = 5 mats fill the floor on paper. In practice, the perimeter pieces are trimmed to the snapped line. Laid with the 6 foot side along the 12 foot wall, two mats span the wall and two rows fill 8 feet of the depth.
The fifth mat, cut lengthwise into two 2 by 6 foot strips, fills the last 2 feet against the back wall. At about 100 pounds per mat1, the floor adds 5 x 100 = 500 pounds of rubber. Each full mat1 is roughly twice the 51 pound NIOSH load constant6, while each strip is about 100 / 2 = 50 pounds. NIOSH sets that constant for ideal conditions only6, so even a strip is a careful lift from the floor.
CCOHS adds that frequent lifts or loads held far from the body raise injury risk6. A mat lifted off the floor is a load held far from the body. On a framed upper floor, add that 500 pounds to the equipment total before anything heavy moves in. The guide to floor load limits explains how to frame that question for a structural engineer.
Dry-fit every piece before tape or glue touches the floor, because moving a 100 pound mat twice costs far more effort than planning it once.
Step 5: Cut Clean Edges and Openings
Clean cuts come from a sharp blade, a fixed straightedge and several light passes, not from one forced stroke through thick rubber. The Iso-Step guide calls for rough cuts long enough to run a few inches up the wall, a relaxing period, and then a final trim with a square2.
- Mark the cut on the top face with chalk or a paint pen, measured from the snapped line rather than the wall.
- Clamp or kneel on a metal straightedge and score along it with a fresh utility blade.
- Bend the piece away from the cut to open the groove, then repeat light passes until the blade is through.
- Change blades often; a dull blade wanders and tears the rubber.
- For pipes, posts and door casings, trace a cardboard template first and transfer it to the rubber.
Seam fit is set by a small overlap, not a gap. In both its glue-down and tape methods, the Iso-Step guide sets each new roll with an overlap of no more than one-eighth inch2. The material is then worked back to eliminate the overlap2. It adds that rolls laid end to end with more than one-quarter inch of width variance can produce peaked seams2.
Cut with the blade moving away from the free hand and body every time; thick rubber resists, and the slip that follows is where knife injuries happen.
Step 6: Secure Seams, Edges and Doorway Transitions
Securing the floor means choosing between a tight loose lay, double-faced tape at the seams, and a full glue-down, then dealing with every exposed edge. The right choice depends on how heavy the pieces are and how permanent the gym will be.
| Method | What the guide states | Best fit |
|---|---|---|
| Double-faced tape | Carpet tape with a minimum width of two inches, two strips per seam; the guide adds that tape may not hold in every situation and that a taped installation cannot be warranted2 | Rolls in a home gym that may move later |
| Full glue-down | Adhesive open time of 30-40 minutes at 70°F and 50% relative humidity; roll with a 75-100 lb roller2 | Permanent rooms with a tested, dry slab |
| Tight loose lay | Penn State warns that multi-piece stall mats without a secure connection can walk apart1 | Stall mats fitted tight to the walls, with seams taped or checked for movement |
Exposed edges are the remaining trip hazard. A change in level is a vertical step between two walking surfaces, such as a mat edge sitting on bare concrete. The ADA Standards allow a change in level up to 1/4 inch high to be vertical5. Up to 1/2 inch high, they require a bevel no steeper than 1:2, and above 1/2 inch high they require a ramp5. Those rules cover public facilities and exempt areas of sport activity5, so Home Gym Specs uses them only as a benchmark for a trip-resistant home edge.
Against that benchmark, stall mats from 1/2 to 3/4 inch thick1 already exceed the 1/4 inch high maximum for a vertical change in level5. A thin mat sits at the beveled maximum, and a thick mat goes past it.
A beveled reducer strip at a doorway or walkway edge keeps a change in level up to 1/2 inch high within a slope not steeper than 1:25. By the same benchmark, a mat 3/4 inch thick1 in a walking path calls for a ramp-style transition piece. Anything bolted through the rubber into the slab, such as a cable machine, follows a separate process covered in anchoring a pulley system.
Tape suits a rolled-rubber floor that may move later, accepting the maker’s no-warranty caveat, while glue suits a permanent room with a proven dry slab. Either way, every exposed walkway edge needs a transition.
Step 7: Finish, Clean and Let the Floor Settle
A new floor needs time before heavy use, a first cleaning, and a recheck of the seams once the room cycles through normal conditions. After a glue-down, the Iso-Step guide keeps foot traffic off for a minimum of 24 hours and rolling loads off for a minimum of 72 hours2.
- Sweep, dust mop or vacuum away grit before the first wet cleaning.
- Damp mop with a cleaner the flooring maker approves; the guide lists exposure to grease and petroleum-based materials among unsuitable environments2.
- Move equipment in on plywood or carried, never dragged across new seams.
- Walk every seam and edge after a few weeks and re-tape anything that has lifted.
Spills and leaks under rubber deserve quick attention. The EPA advises drying water-damaged areas and items within 24-48 hours to prevent mold growth3. In a gym, that means lifting the affected mats rather than mopping around them.
The first month of use is part of the installation, because that is when relaxed rubber, settled seams and the room’s real humidity show themselves.
Common Installation Mistakes to Avoid
Many failed floors trace back to skipping a check rather than to the product. These four mistakes cover the usual rework.
- Laying rubber over an untested slab. Moisture problems surface weeks later as odor or damp patches. Test first, and fix drainage before flooring.
- Cutting on delivery day. Cold or freshly unrolled rubber changes size as it settles. Wait out acclimation, then trim.
- Following the wall instead of a line. Walls are rarely straight, so a wall-guided first row drifts. Snap a chalk line and work from it.
- Leaving a thick edge in a walkway. A raised edge catches toes and feet while carrying plates. Add a beveled or ramped transition, matched to the edge height, at every exposed edge.
What a Finished Floor Should Look Like
A finished floor reads as one surface: tight seams, no rocking pieces, and no exposed edge that catches a foot. Check each item below before the first heavy session.
- Seams sit tight and flush, with no peaks or gaps along their length.
- No tile or mat rocks when stepped on at its corners.
- Full pieces sit under the rack and lifting area; cut pieces sit at the walls.
- Every walkway edge has a beveled or ramped transition.
- Room humidity follows the EPA guideline from Step 1: if possible, below 60 percent3.
Frequently Asked Questions
Do you need to glue down rubber gym flooring?
Not always. Stall mats can be loose-laid tight to the walls, and rolled rubber can be held with double-faced tape at the seams. The Iso-Step guide specifies tape with a minimum width of two inches2. It also warns that tape may not hold in every situation and that a taped installation cannot be warranted2. Glue-down suits permanent rooms with a dry slab.
What do you put under rubber gym flooring on concrete?
On a clean, dry, flat slab, rubber goes straight onto the concrete, which the Iso-Step guide lists as an approved base2. Moisture is the exception. The 2021 IRC exempts garages from the under-slab vapor retarder4, so a damp garage slab needs its moisture source fixed before any layer goes on top.
Can you install home gym flooring over carpet?
Carpet is not a listed base in the rubber-roll guide used here, which names concrete, Portland-based patching materials and wood2. Soft carpet lets heavy rubber shift and rock. The practical route is to pull the carpet and pad, check the subfloor beneath, and lay the rubber on that firm surface.
How do you cut rubber stall mats?
Score along a clamped metal straightedge with a sharp utility knife, bend the mat to open the groove, and repeat light passes until the blade is through. Stall mats commonly run 1/2 to 3/4 inch thick1, so expect several passes per cut and a fresh blade every few cuts.
How do you keep gym mats from sliding?
Lay the mats tight from wall to wall so the perimeter holds the field, tape the seams on rolled rubber, and keep the slab clean and dry. Penn State Extension notes that smooth multi-piece stall mats can work apart without a secure connection between pieces1. Weight alone does not hold them, so tape or adhesive at the seams adds the connection a tight fit lacks.
Limitations and Edge Cases
- The steps assume rubber flooring: rolls, interlocking tiles and stall mats. Floating vinyl plank, hardwood and foam tiles follow their own makers’ instructions.
- The acclimation, flatness, moisture and adhesive limits come from one maker’s 2026 installation guide; other products set different limits, and the installed product’s own guide governs.
- The ADA edge rules serve here only as a benchmark; they do not govern private homes and they exempt areas of sport activity.
This guide is engineering-informed education, not a substitute for a licensed professional. Standing water, recurring seepage, a cracked or heaving slab, or a soft wood subfloor calls for a licensed contractor before installation. Heavy equipment on an upper floor calls for a structural engineer.
References
Methodology: each sourced figure links to the document that states it. The mat count, weights and coverage in the worked example and the edge-height comparison are Home Gym Specs arithmetic from those values, under the founder’s editorial responsibility.
- Penn State Extension – Horse Stable Flooring Materials and Drainage, Eileen Wheeler and Jennifer Smith Zajaczkowski, updated May 19, 2016.
- Acoustical Solutions – Iso-Step Rubber Gym Flooring Rolls Installation Guide, revised January 23, 2026, PDF.
- U.S. Environmental Protection Agency – A Brief Guide to Mold, Moisture and Your Home, last updated February 18, 2026.
- UpCodes – 2021 International Residential Code as adopted in Utah, Chapter 5 Floors, Section R506.2.3 Vapor Retarder.
- U.S. Access Board – ADA Accessibility Standards, Chapter 3 Building Blocks, Sections 302.1 and 303 Changes in Level.
- Canadian Centre for Occupational Health and Safety – NIOSH Lifting Equation: Assessing Relevant Handling Factors, OSH Answers fact sheet.
Conclusion
Home gym flooring goes down cleanly when the order holds: moisture, flatness, acclimation, layout, cuts, then seams and edges. Start with the room, not the rack, because a tested slab and a straight first line do more for the finished floor than any premium mat.
See the home gym flooring overview for how this installation fits the wider flooring plan.