A strength zone is the area of a home gym where rack work, barbell training, and heavy pressing occur. It is the most space-intensive zone in the room and the one where clearance errors carry the highest risk. A standard men’s barbell runs 86.75 inches1 end to end; a full power rack may stand 82 to 90 inches tall. The rack, bar, bench, and plates define a working envelope that must be mapped before a single piece arrives.
Quick Answer
What is Strength Zone Design?
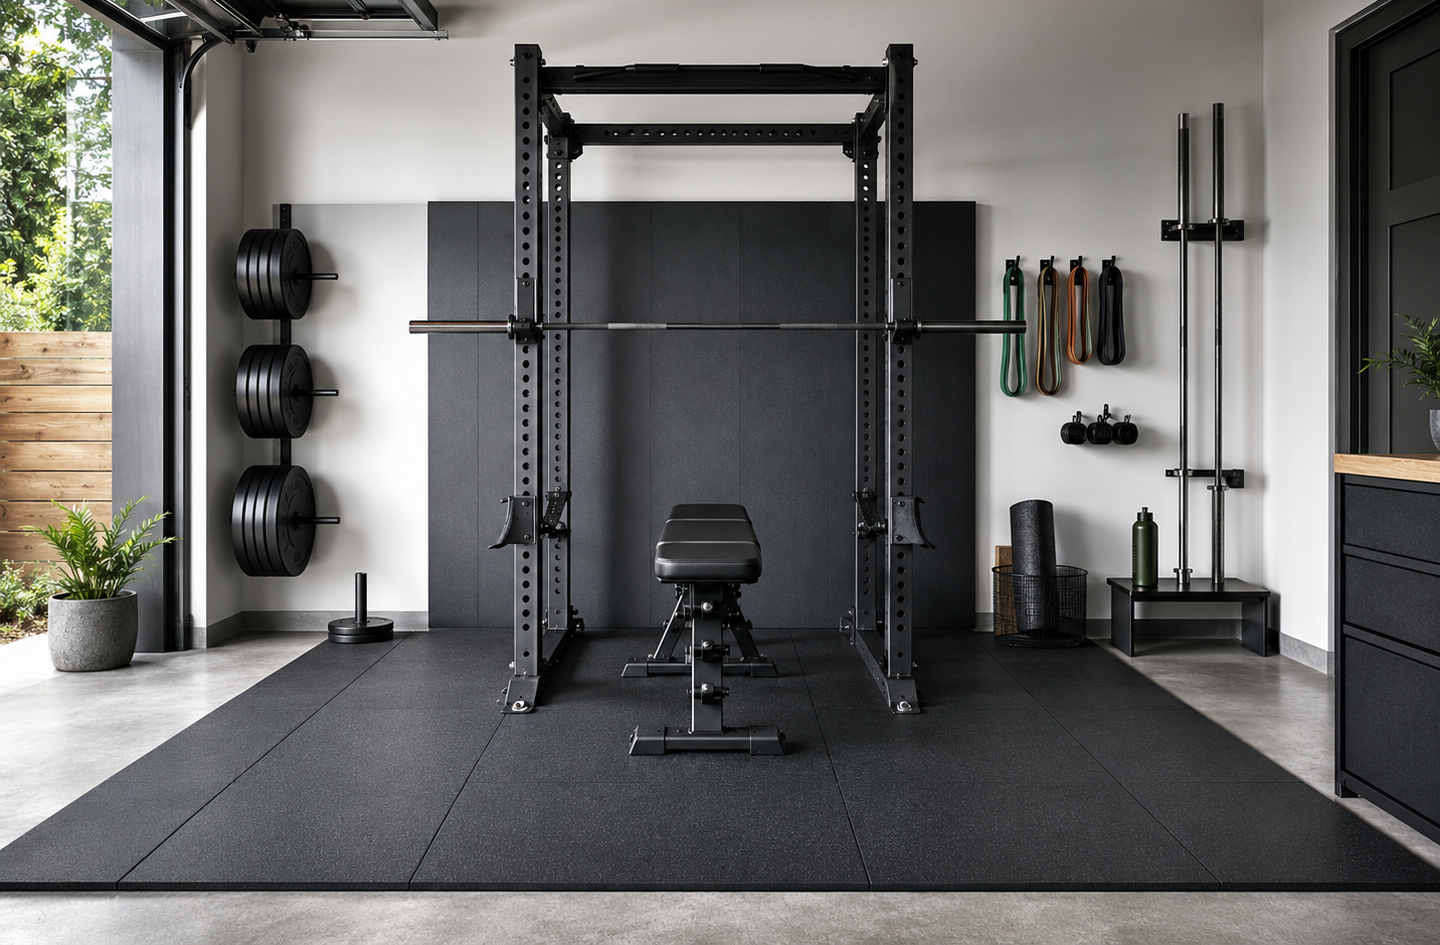
Strength zone design is the process of planning the dedicated lifting area where a rack, barbell, bench, and weight plates operate safely together. A 7-foot bar is 86.75 inches1 long regardless of the room. A power rack may stand 82 to 90 inches tall. Successful design maps ceiling height, side clearance, floor load, bench fit inside the rack, and storage placement before any equipment is purchased.
Why it matters:
A rack placed without checking ceiling height, a bar too long for the side clearance, or a bench that does not fit inside the uprights are layout problems – not equipment problems. They are harder to fix after installation than on paper.
Key Takeaways
- A standard men’s barbell is 86.75 inches long with 16.4 inches1 of loadable sleeve per side, requiring clear wall space beyond the rack on each loaded end.
- Ceiling height caps the rack’s upright height and determines whether overhead press is possible above the J-cups.
- IRC 2021 Table R301.5 sets a minimum residential live load of 40 lbs per square foot4 – a code floor that may require professional review for concentrated rack and plate loads.
- Competition platforms are specified at 4 m3 x 4 m; home deadlift zones need less but still require a defined footprint before the rack is positioned.
- Storage – plate trees, barbell holders, and organization – is part of the zone’s safety design, not an optional finish step.
Strength Zone Design in 30 Seconds
| If you are… | Do this |
|---|---|
| Buying a first rack | Measure ceiling height before selecting upright height; match the rack to the room |
| Choosing a barbell | Confirm wall-to-wall clearance handles 86.75 in plus a plate-loading margin on each side |
| Adding a bench | Verify bench length clears the inside width of the rack’s uprights at flat angle |
| Planning in a shared garage | Map the car door swing before fixing the rack position on the floor |
| Working with a low ceiling | Use a half rack or squat stand; many full power racks need 90 or more inches of vertical clearance |
| Starting from scratch | Plan storage last – plate trees fill space once the rack, bar, and bench footprint is confirmed |
What Is Strength Zone Design?
Strength zone design is the discipline of planning the primary lifting area in a home gym. The four core elements are rack, barbell, bench, and plates; each requires clearance to operate safely. The zone covers the rack’s upright footprint, the bar’s full length with loaded sleeves, the bench positioned inside or adjacent to the rack, and the loading path. Plate and barbell storage must stay within arm’s reach.
The strength zone is defined by two fixed numbers before any layout decision: the bar’s length and the rack’s height. A standard men’s competition bar is 2.2 m (86.6 in) long and weighs 20 kg2 (44 lb), per International Powerlifting Federation technical standards. A full power rack adds 80 to 90 inches in the ceiling direction. These numbers arrive with the equipment; the room must be ready to receive them.
Strength zone design applies to any room – garage, basement, spare bedroom – but the room type shifts which constraint arrives first. Ceiling height limits the rack’s upright. Side clearance limits the bar. Floor construction limits total concentrated load. Wall condition limits anchored or wall-mounted equipment. Getting those four constraints measured before any equipment is ordered is the definition of room-first planning in the strength zone.
Why Strength Zone Design Matters
The strength zone is where the heaviest equipment meets the smallest clearances. A rack too tall for the ceiling cannot be safely returned after the box is damaged in shipping. A bar that extends past an open wall into a stairwell cannot be safely un-racked. A bench too long to clear the inside of the uprights on flat press forces a dangerous partial setup. These are layout problems, and they cost more to fix after the fact than to prevent on paper.
Floor load is the most commonly overlooked constraint. The International Residential Code 2021 Table R301.5 sets a minimum distributed live load of 40 lbs per square foot4 for habitable rooms. A loaded rack, barbell, and plates concentrate several hundred pounds on a footprint of a few square feet, well above that code floor. Professional structural review may be required before a heavy rack installation, particularly in a basement or above a crawl space.
- Clearance errors in the strength zone are harder to fix than in any other gym area because the equipment is large, heavy, and anchored.
- Layout decisions made out of order – equipment purchased before ceiling height is checked – are the leading cause of rework in home gym builds.
- A well-designed zone is also a safer one: clear loading paths, defined bail-out zones, and organized storage reduce risk on every set.
The Five-Part Strength Zone Design Framework
Five core dimensions cover the whole topic of strength zone design. Each must be addressed in sequence: the rack anchors the zone, the bar defines its width, the bench fills its interior, storage organizes its edges, and the room sets the hard limits on all four.
The Anchor: Rack Selection and Footprint
The rack sets all subsequent dimensions. A full power rack offers independent safeties – bail-out arms that catch a missed lift at any height – and a footprint of 48 to 54 inches front-to-back. A squat stand or open rack cuts that depth to 24 to 30 inches but removes the built-in safety net, requiring spotter arms and careful load management. A wall-mounted folding rack collapses to a few inches when stored but requires a professionally verified anchor wall; drywall alone does not carry the load.
Every rack has an upright height and a J-cup height range. Both must clear the ceiling. A rack too tall does not fit. A J-cup set too low for a tall lifter on squat is equally limiting. Measure ceiling height against upright height and J-cup position before purchase, not after the box arrives.
Deeper read: squat rack vs. full power rack selection by room type.
Deeper read: squat rack dimensions and fit.
Deeper read: powerlifting rack selection for heavy solo lifts.
Deeper read: matching a home squat rack to ceiling and floor.
Deeper read: folding squat racks and wall-fit requirements.
Deeper read: combined bench press and squat rack – one frame or two.
Deeper read: sizing a bench and squat rack pair to one corner.
The Bar: Length, Weight, and Side Clearance
The barbell’s total length is the number the room must clear before any other bar decision matters. A standard men’s Olympic bar measures 86.75 inches1 total, with 16.4 inches1 of loadable sleeve per side and a 51-7/8 inch shaft span between the inner collar faces. The sleeve extends 16 inches beyond the rack’s upright on each side when the bar is racked; each wall must clear the outermost loaded plate with a practical margin for plate handling. A room less than 10 feet wide presents real challenges for a full-length bar.
Bar selection beyond length involves shaft stiffness, knurl, and diameter. A stiffer powerlifting bar suits squat, bench, and deadlift. A short bar – 5 or 6 feet – reduces side clearance demands but also reduces loadable sleeve length, capping total working weight. Whether one bar can serve the full program in a given room depends on the room’s width and the training priority.
Deeper read: picking an Olympic barbell for a home rack setup.
Deeper read: choosing an Olympic bar for a rack and available space.
Deeper read: Olympic bar dimensions and the clearance they demand.
Deeper read: choosing one barbell for a rack and available space.
Deeper read: whether a powerlifting bar fits a rack and lifting zone.
Deeper read: short barbells for tight racks and narrow rooms.
Deeper read: loaded barbell weight end to end.
The Bench: Pressing Surface and Interior Fit
The bench occupies the interior of the rack for pressing and defines how that inside space is used. Pad height positions the lifter’s mid-chest under the J-cup hooks when the bar is racked; most benches sit at 17 to 18 inches, which suits most lifters with feet flat on the floor. Pad length must clear the inside width of the uprights – most full power racks measure 24 to 30 inches of inside width, and a bench pad plus its base legs often extends 42 to 50 inches total.
An adjustable bench adds incline angles but introduces new geometry at each setting: the raised end can contact the overhead cross-bar of a power rack at higher inclines. Stability under load is a safety variable – a bench that flexes under a near-maximal set is not suitable for solo rack work. For dumbbell pressing away from the rack, pad width and elbow clearance outside the uprights matter as much as length inside them.
Deeper read: choosing a bench that fits under the bar and the rack.
Deeper read: the weight bench that belongs in a rack, not just the room.
Deeper read: adjustable benches for the rack: how to pick the right one.
Deeper read: adjustable bench dimensions for safe rack clearance.
Deeper read: the right bench for heavy dumbbell work at home.
Storage and the Loading Path
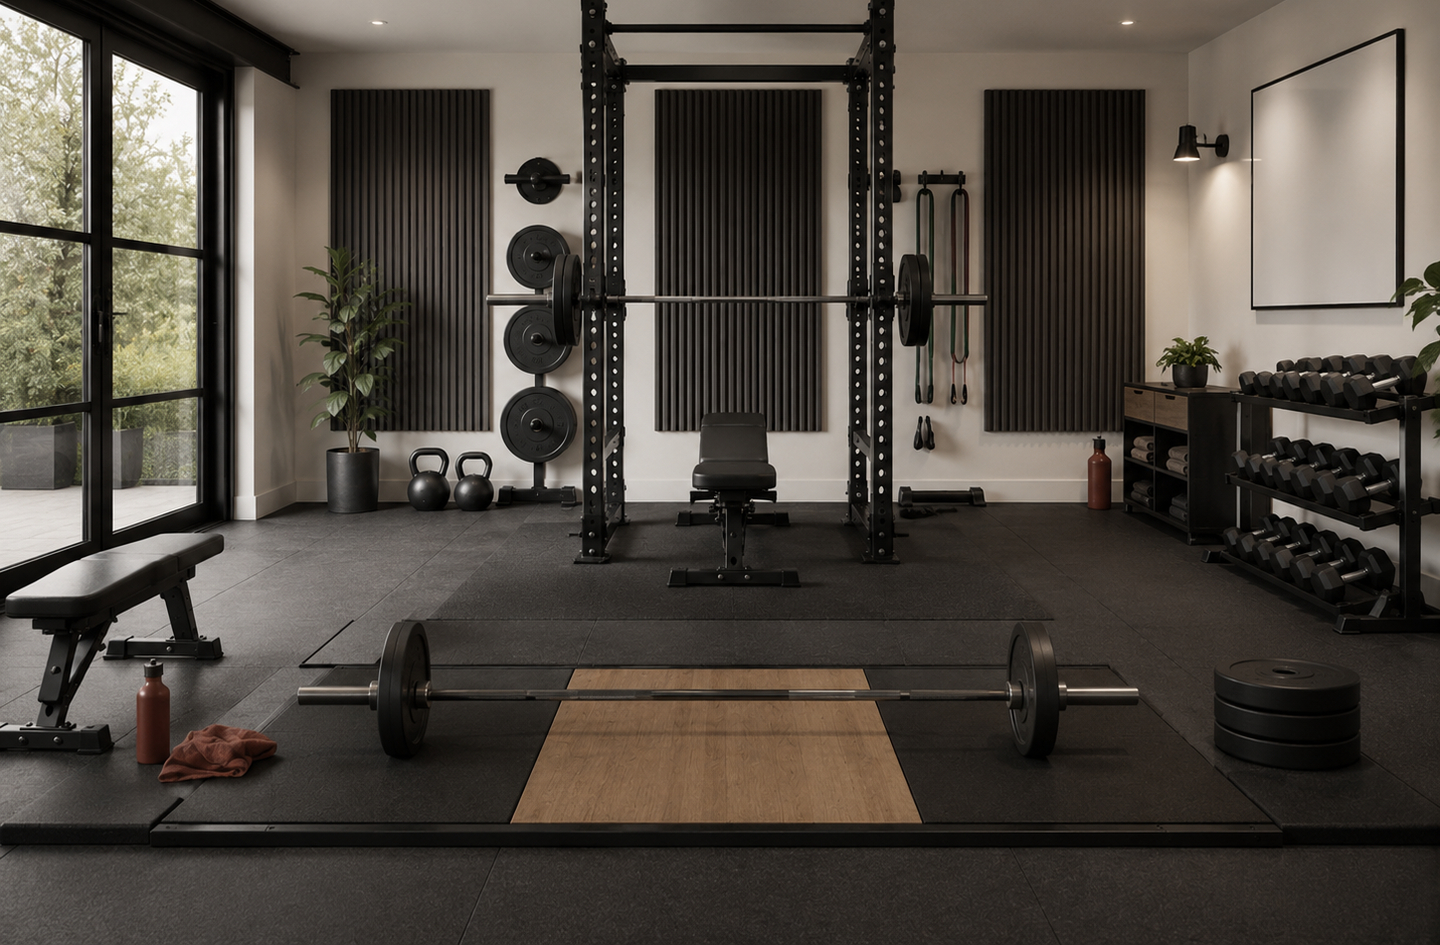
Plates and bars off the rack need a location that keeps the loading path clear. A plate tree too close to the rack forces sideways movement during loading; one too far adds extra distance after a heavy set. The operational rule is plates within arm’s reach of the rack’s sleeve ends, without the storage footprint entering the bail-out zone behind the rack. Vertical barbell holders keep bars off the floor and eliminate a tripping hazard that grows more serious as working weights increase.
A deadlift platform anchors the floor portion of the zone and protects the subfloor from impact. IWF competition platforms are specified at 4 m3 x 4 m (approximately 13 ft x 13 ft). A home platform of 8 ft x 8 ft provides a practical footprint for floor protection and zone definition. On unfinished concrete, high-density rubber mats may substitute, but the loading footprint still needs to be defined before the rack is positioned.
Deeper read: barbell storage that keeps bars off the floor and path.
Deeper read: storing plates and bars without crowding the loading path.
Deeper read: whether a lifting platform is needed and where it goes.
Room Envelope: Ceiling, Floor, and Clearance
The room sets the hard limits on every other decision. Ceiling height caps the rack’s upright. Wall distance limits the bar. Floor construction determines whether a structural engineer should be consulted before a loaded rack is installed. Professional standards for strength facilities recognize that the loading path and bail-out zone are safety-critical design elements of any free-weight training area5.
Room type shapes which constraints arrive first. An unheated garage adds material considerations: steel contracts in cold, rubber flooring stiffens, and adhesive-backed mats can lift in freeze-thaw cycles. A basement may have irregular ceiling beams, moisture that affects rubber flooring off-gassing, and ventilation limitations. A compact lifting kit in a small room must be chosen so every piece earns its footprint, and the purchase order matters as much as the product choice.
Deeper read: garage lifting gear judged by concrete, cold, and clearance.
Deeper read: compact strength gear that still handles real load.
Deeper read: which equipment earns its footprint in a lifting zone.
Deeper read: a pared-down lifting kit that covers the big lifts.
Deeper read: what home gym equipment is worth starting with.
Deeper read: the core strength pieces every lifting zone needs.
Deeper read: building a strength corner: what to buy first and why.
Deeper read: where stronger equipment matters in a compact lifting zone.
How to Choose the Right Strength Zone Layout
The single most important decision criterion in layout selection is ceiling height, because it limits the rack before any other choice is possible. Work through these six steps in order.
- Measure the ceiling first. Rack upright height plus J-cup height plus bar diameter determines whether overhead press is possible. For squats and bench press only, 8-foot ceilings usually work if the upright stays at or below 82 inches. Overhead press typically needs 9 to 10 feet of clearance at lockout.
- Map side clearance. Measure wall-to-wall width. Subtract 86.75 inches for the bar. The remainder splits between both sides. A minimum of 6 inches per side is a practical floor for plate handling; more is better.
- Assess the floor. Concrete slab-on-grade handles concentrated loads well. Wood-joist floors require verification of actual structural capacity beyond the IRC minimum of 40 lbs per square foot4 for distributed loads. A licensed structural engineer should assess the specific case before anchoring a loaded rack to wood joists.
- Choose the rack to match the room. Match upright height to ceiling clearance, footprint to floor space, and rack type to solo-vs-spotter use. Choose the rack from measured dimensions, not from a product list.
- Size the bench to the rack. Confirm pad length clears inside-upright width at flat angle. Confirm pad height positions the lifter correctly under the J-cups. For adjustable benches, confirm the raised end clears the overhead bar at every planned incline angle.
- Plan storage last. Plate trees and barbell holders fill remaining wall and corner space once the rack, bench, bar, and platform footprint are drawn to scale. Storage placed first boxes in the loading path.
| Factor | What to check | Practical minimum | Notes |
|---|---|---|---|
| Ceiling height | Rack uprights + J-cup + bar path | 8 ft for squat and bench | 9-10 ft for overhead press |
| Side clearance | Wall to loaded sleeve end | 6 in per side | More allows easier plate handling |
| Floor load | Total weight on rack footprint | Verify vs. IRC 40 lbs/sq ft minimum | Consult engineer for wood joists |
| Inside rack width | Bench fits + bar racks correctly | 24 in between uprights | Match to bench pad dimensions |
| Bail-out depth | Clear path behind the rack | 24 in minimum | More allows safer missed-lift exit |
Compare All Strength Zone Configurations
| Criteria | Squat Stand | Half Rack | Full Power Rack | Folding Wall Rack | Corner Setup |
|---|---|---|---|---|---|
| Typical footprint | 6-10 sq ft | 12-16 sq ft | 20-28 sq ft | 2-4 sq ft folded | 40-55 sq ft |
| Built-in safeties | No (spotter arms optional) | 1 pair, limited height range | 2 pairs, full height range | 1 pair, limited | 2 pairs (full rack) |
| Front-to-back depth | 24-30 in | 36-44 in | 48-54 in | 18-24 in deployed | 48-54 in plus bench |
| Floor anchoring | Optional | Recommended | Required | Required (wall) | Required |
| Best situation | Moderate load, spotter available | Space-saving solo moderate loads | Solo heavy lifting, dedicated space | Floor space must be reclaimed | Full program, permanent setup |
Choose a squat stand if: load is moderate and a spotter or safety straps are always in use.
Choose a half rack if: solo lifting at moderate to heavy loads is the plan and a full power rack depth exceeds the available floor.
Choose a full power rack if: heavy solo lifting is the primary use and the ceiling clears the uprights.
Choose a folding wall rack if: the wall can be professionally verified to hold the anchor load and floor space must be fully recovered between sessions.
Choose a dedicated corner setup if: a permanent full-program zone is the goal and the room dimensions support it.
Deeper read: squat rack vs. full power rack by room type.
Common Mistakes
Mistake 1: Ordering the Rack Before Measuring the Ceiling
Why it is a mistake: Rack upright heights range from 70 to over 90 inches. The difference between a rack that fits and one that does not is often 2 to 4 inches. A rack that arrives and does not clear the ceiling cannot be used safely and often cannot be returned after shipping damage.
What to do instead: Measure the ceiling in multiple locations – joists, beams, and HVAC runs can create local low points. Subtract J-cup height from upright height to find the minimum racking position. Confirm overhead press clearance separately if that lift is planned.
Read more: matching a home squat rack to ceiling and floor.
Mistake 2: Ignoring Side Clearance Before Ordering the Bar
Why it is a mistake: The loadable sleeve extends 16.4 inches1 beyond the rack’s outer upright on each side of a standard bar. Many home gym rooms have walls, columns, or car doors within that range. Loading plates on a sleeve pressed against a wall is impractical and becomes unsafe under fatigue.
What to do instead: Measure the full bar length against available wall-to-wall width. If the room is too narrow, evaluate a short bar – 5 or 6 feet – and accept the reduced sleeve length as a deliberate trade-off.
Read more: Olympic bar dimensions and the clearance they demand.
Mistake 3: Selecting an Adjustable Bench Without Checking Rack Interior Fit
Why it is a mistake: Adjustable benches are wider and longer than flat benches, and the raised end at incline can contact the overhead cross-bar of a power rack. A bench that fits at flat angle may not fit at 30 or 45 degrees. Discovering this after delivery means either returning the bench or abandoning incline work inside the rack.
What to do instead: Check the rack’s inside width against the bench’s widest point. Confirm the raised end at the steepest planned incline angle clears the rack’s overhead bar. Both dimensions are available from manufacturer specifications before purchase.
Read more: adjustable bench dimensions for safe rack clearance.
Mistake 4: Placing the Plate Tree in the Loading Path
Why it is a mistake: A plate tree positioned behind the rack or beside the sleeve ends blocks the natural movement path during loading. Under a heavy working set, navigating around storage is a real trip-and-drop hazard – typically discovered the first time a heavy set is attempted, after the tree is fixed to the floor or wall.
What to do instead: Map the loading path from plate storage to sleeve end before placing any storage piece. The path should allow straight-line movement from the tree to the sleeve without turning or crossing the bail-out zone behind the uprights.
Read more: storing plates and bars without crowding the loading path.
Mistake 5: Skipping Floor Assessment Before Installing a Loaded Rack
Why it is a mistake: A fully loaded rack concentrates significant mass on a small footprint – often 4 to 6 square feet. A wood-joist floor rated to the IRC minimum of 40 lbs per square foot4 for distributed load may not handle that point-load in a basement or above a crawl space.
What to do instead: Identify floor construction type before purchase. Concrete slab-on-grade generally tolerates heavy concentrated loads. For wood-joist construction, consult a licensed structural engineer who can assess the specific span, joist size, and loading scenario before anchoring the rack.
Read more: building a strength corner: what to buy first and why.
Best Strength Zone Design by Use Case
Best for a First Home Gym Build
Start with the rack, sized to the ceiling and available floor space. Add the bar next, confirming side clearance. Bench and plates follow. Storage is placed last, filling space that remains after the core zone is mapped. This order prevents the most common first-build mistake: purchasing equipment whose dimensions conflict before a single set is attempted.
Deeper read: what home gym equipment is worth starting with.
Best for a Garage Shared with a Vehicle
The car door swing and the rack footprint must be mapped together before the rack position is fixed. A folding rack recovers floor space fully when not in use but requires wall anchoring that must be professionally verified. A permanent power rack works in a shared garage only if the vehicle can enter and exit with the rack in its fixed position and the garage door tracks clear the uprights.
Deeper read: garage lifting gear judged by concrete, cold, and clearance.
Best for a Low Ceiling (Under 84 Inches)
A squat stand or low-profile half rack avoids the upright-height problem entirely. Overhead press above the rack is not an option in these rooms; standing presses are also height-limited. The focus in a low-ceiling zone is squat, bench, and deadlift – all of which are achievable with the right equipment selection and correct rack height.
Deeper read: folding squat racks and wall-fit requirements.
Best for a Small Room or Compact Footprint
Every piece must justify the floor area it claims. A compact zone built around a half rack or squat stand, a 7-foot bar (or shorter, if side clearance demands it), and wall-mounted plate storage can handle the four main lifts in under 50 square feet. The trade-off is reduced bail-out clearance and the absence of built-in safeties – both must be managed by the training approach.
Deeper read: compact strength gear that handles real load.
Best for a Dedicated Heavy Lifting Setup
A full power rack with a built-in safety system, a 7-foot powerlifting bar, and a defined deadlift platform anchors a zone built for heavy solo training. The rack should be floor-anchored per the manufacturer’s requirements. Competition powerlifting equipment specifications6 provide reference dimensions for equipment compatibility in a heavy home setup focused on the competition lifts.
Deeper read: picking a powerlifting rack that anchors heavy lifts.
Frequently Asked Questions
How much floor space does a home strength zone need?
A full power rack occupies a limited footprint, but the working zone – including bar sleeve clearance on both sides, bench, bail-out path, and nearby storage – requires considerably more floor area. A compact setup with a squat stand or folding rack works in a smaller space, but the loading path and bail-out space must be preserved even in a tight footprint.
What ceiling height do I need for a home squat rack?
Squat rack uprights range from 70 to over 90 inches. For squat and bench press only, 8-foot ceilings usually work with an upright at or below 82 inches. Overhead press at lockout for a 6-foot lifter typically needs 9 to 10 feet. Measure rack upright height plus J-cup height before purchasing, not after delivery.
Will a standard 7-foot barbell fit in a narrow room?
A standard men’s bar measures 86.75 inches1 total and requires at least that much wall-to-wall clearance, plus a plate-loading margin on each loaded sleeve. Rooms narrower than 10 feet present real side-clearance challenges. Short bars of 5 to 6 feet reduce clearance demands but limit loadable sleeve length, capping the total working weight for heavy compound lifts.
What equipment belongs in a basic home strength zone?
A rack, a 7-foot barbell, and weight plates covering the planned working range form the minimum. Rubber flooring protects the floor. A bench is needed for bench press and incline work. Plate storage and a barbell holder are not minimum but significantly reduce tripping risk. That core set handles squats, deadlifts, bench press, and overhead press in one zone.
Is a lifting platform necessary for deadlifts at home?
A platform is not required but is recommended on wood-joist floors where repeated impact from set-down weight is a concern. A platform distributes that impact and protects the subfloor. A home platform at 8 feet by 8 feet provides a practical zone-definition footprint. On unfinished concrete slab, high-density rubber mats may be adequate, but floor condition should be assessed first.
What This Hub Does Not Cover
- Certified structural engineering, load calculations, or stamped plans – this hub is engineering-informed educational content, not a substitute for a licensed structural engineer or contractor on any specific project.
- Wall anchoring for folding or wall-mounted racks – the anchor surface must be professionally verified before installation; this hub describes planning considerations, not installation procedures.
- Ventilation, climate control, or electrical planning for a strength zone – these are addressed in separate topic guides and require professional assessment for any specific space.
- Flooring material selection in depth – rubber mat thickness, subfloor protection, and moisture management are covered in dedicated flooring guides on this site.
References
- Rogue Fitness – Ohio Bar product specifications: total length 86.75 in, weight 20 kg (44 lb), shaft 28.5 mm, loadable sleeve 16.4 in per side, between-sleeve span 51-7/8 in
- International Powerlifting Federation – IPF Technical Rulebook: men’s competition barbell specifications including length (2.2 m), weight (20 kg), and shaft diameter requirements
- International Weightlifting Federation – IWF Technical and Competition Rules: competition platform dimensions (4 m x 4 m) and barbell specifications
- International Code Council – International Residential Code 2021, Table R301.5: Minimum Uniformly Distributed Live Loads (40 lbs/sq ft for habitable rooms other than sleeping rooms)
- National Strength and Conditioning Association – NSCA Strength and Conditioning Professional Standards and Guidelines: facility design principles for free-weight training areas including safety zone and loading path requirements
- USA Powerlifting – USAPL Technical Rules: equipment specifications for competition powerlifting, used as reference dimensions for home equipment compatibility in strength-zone planning
Next Read
Designing a strength zone starts with three numbers: ceiling height, wall-to-wall width, and floor construction type. Those measurements determine the rack, which determines bar clearance, which determines whether a bench fits inside the uprights. Getting that sequence right before any equipment is purchased prevents the most common and most costly rework in home gym builds. Walls before racks, clearance before the first heavy set.