
Room shape determines more about your small home gym layout than your equipment list. A square room positions a power rack very differently from a narrow room, and a multipurpose room needs its own logic entirely. According to CivicScience, 21% of Americans now maintain a home gym1, yet most planning advice skips the room shape. For the broader planning context, start with the home gym layout overview. This article compares three common room configurations and shows which arrangement preserves floor space and training flow in each.
Quick Answer
Which room shape works best for a small home gym?
Square rooms support the most flexible arrangement because equal wall lengths allow the rack and cardio equipment to sit on opposite walls with clear floor space in between. Narrow rooms work well when equipment runs along the long walls in a linear sequence. Multipurpose rooms require defined zones with hard boundaries so workout gear does not spill into the room’s secondary function. The NSCA recommends a minimum of 100 square feet per participant for strength training4, which sets a useful baseline for any layout decision.
Key Takeaways
- Square rooms favor a centered or corner-anchor layout: the rack takes one wall, cardio takes the opposite wall, and the center stays open for free movement.
- Narrow rooms work best with a linear sequence along the long wall: rack at one end, cardio at the other, storage above or between.
- Multipurpose rooms need physical zone boundaries (flooring change, open shelving, or furniture line) so the gym zone does not spread into the living area over time.
- The NSCA’s clearance standard of 36 inches between free-weight stations4 applies in every room shape – it determines minimum room width before the equipment list does.
- Room shape, not equipment brand, is the planning variable most people skip first.
Quick Comparison: Three Room Shapes at a Glance
The three room shapes differ most in how much usable wall length they give you and where clearance bottlenecks appear first. Use this table to find your scenario before reading the deeper sections.
| Factor | Square Room | Narrow Room | Multipurpose Room |
|---|---|---|---|
| Typical width | 10-14 ft | 7-10 ft | 12-16 ft (shared) |
| Best rack placement | Against one wall, centered | One end of the long wall | Gym-zone corner, away from living area |
| Cardio placement | Opposite wall from rack | Opposite end of long wall | Same gym zone, rear or side wall |
| Storage strategy | Side walls, vertical | Wall-mounted above equipment | Within gym zone only, no floor creep |
| Main clearance risk | Center floor if rack placed too far in | Width (walking path beside equipment) | Zone boundary drift over time |
| Floor-space efficiency | High | Moderate (width-limited) | Low (shared with non-gym use) |
| Best for | Strength-focused or mixed training | Cardio-primary or compact strength | Occasional use alongside home office or guest room |
| Verdict | Most flexible small gym shape | Best for narrow or corridor rooms | Requires strict zone discipline |
The Square Room: Centered Layout with Equal Clearance
A square room gives the most symmetric floor plan of the three shapes. Equal wall lengths mean you can mirror equipment across the center without one wall becoming a dead zone. The challenge is that every wall competes for anchor position equally, which makes the layout decision less obvious than it looks.
Floor Plan Logic for a Square Room
The most reliable approach in a square room is to treat the four walls as two pairs: one pair for high-clearance items (the rack and the bench, which need space in front of them), and the opposite pair for equipment that sits closer to the wall (storage, a cable machine, or cardio). This wall-pairing logic keeps the center floor clear for movement transitions and bar loading.
A 10-by-10-foot square room has 100 square feet of total floor area – which meets the NSCA’s recommended minimum of 100 square feet per participant for a strength training environment4, but only if almost no equipment sits in the center. In practice, a 10-by-10 room works for one lifter using a compact folding rack, a bench, and wall-mounted storage. A 12-by-12 room (144 square feet) opens up significantly more arrangement options and is the more comfortable target for a rack-and-bench setup with a treadmill.
Avoid placing the rack in the center of a square room. A center-floor rack eats clearance in all four directions simultaneously. Instead, anchor the rack to the wall that faces the room’s best light source or mirror position, then let clearance determine where everything else goes. The rack’s rear upright should sit no more than 6 to 8 inches from the wall once you account for weight plate loading width.
Equipment Placement in a Square Room
Start with the rack and the bench as one unit, pushed to one wall. The bench loads from the sides, so it needs clear space to the left and right rather than in front. Place the bench parallel to the wall rather than perpendicular to it: this orientation takes less depth from the room’s center.
On the opposite wall, a treadmill or rowing machine fits well. The NSCA allocates 45 square feet for a treadmill and 40 square feet for a rowing machine in a facility floor plan4. In a home setting with reduced safety cushions, those footprints compress, but the ASTM treadmill standard (F2115-12) still requires 78 inches of rear clearance behind the belt and 19.7 inches on each side6. Place the treadmill so its rear emergency-dismount zone does not overlap with the rack’s barbell loading path.
The two side walls in a square room are your storage walls. Wall-mounted plate storage, dumbbell brackets, and resistance band hooks all belong here because they take no floor space. Keep the side walls clear below waist height so the walking path around the perimeter stays unobstructed. For planning how traffic patterns work within this arrangement, the article on home gym traffic flow covers walking path and plate-loading clearance in detail.
Sibling spoke note: if your square room is specifically 10 by 12 feet, the 10×12 home gym layout article gives a specific floor plan for that exact footprint.
Square room verdict: anchor the rack to one wall, run cardio on the opposite wall, and keep both side walls as vertical storage. The 12-by-12-foot version of this layout handles a rack, bench, treadmill, and dumbbell storage without significant compromise.
The Narrow Room: Linear Layout Along the Long Wall
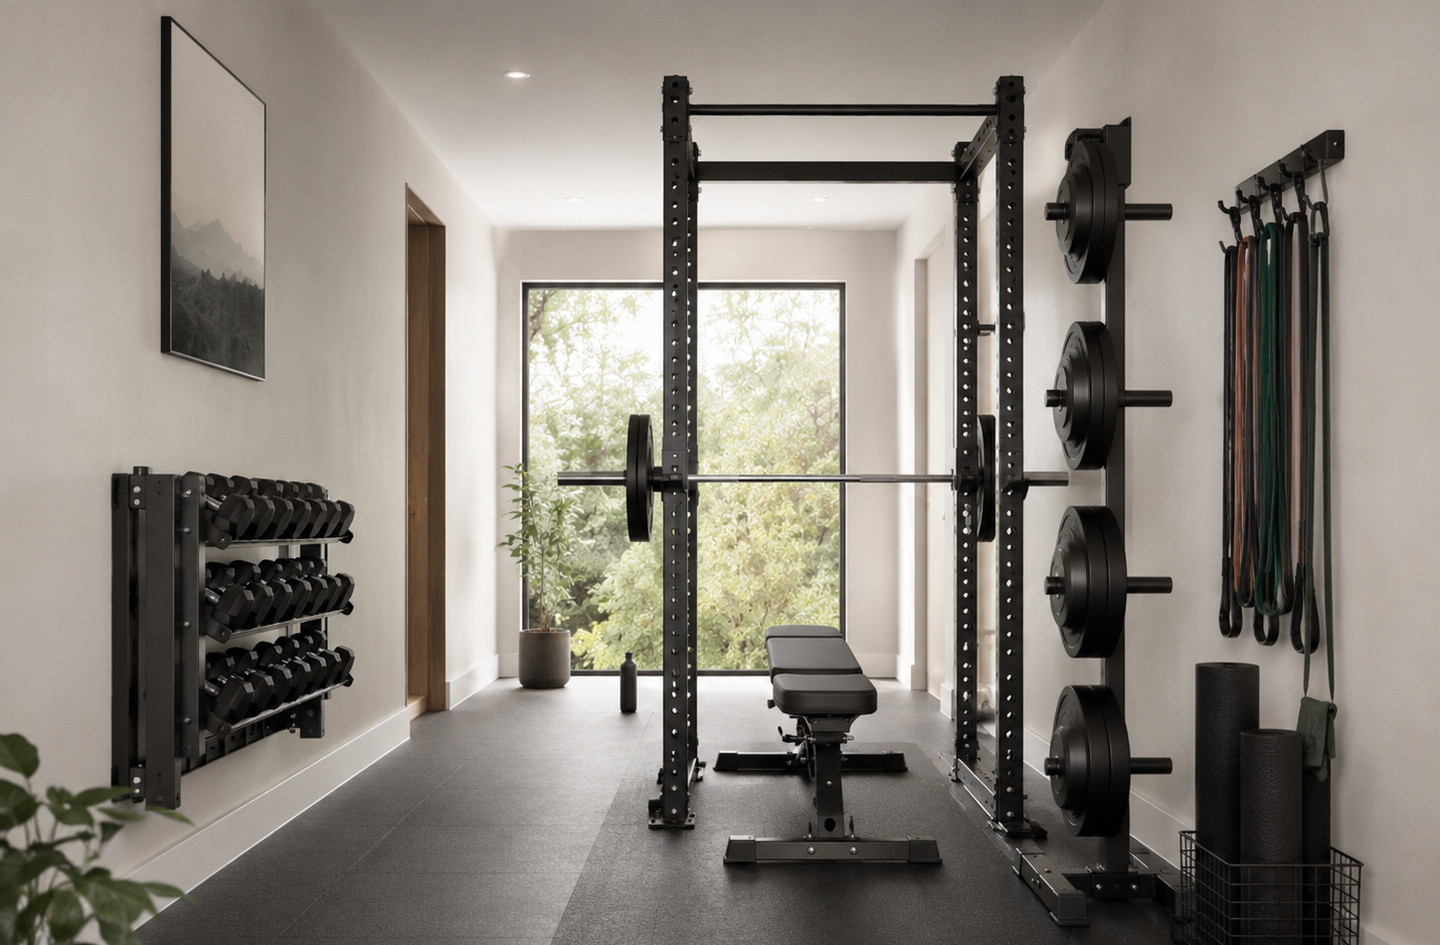
Narrow rooms are the hardest small gym shape to work with because width is the limiting constraint. A room that is 8 feet wide and 14 feet long gives you 112 square feet – roughly equal to a 10-by-10 square room – but the width means only one piece of equipment fits across the room at a time. The layout solution is a linear sequence rather than a paired arrangement.
Floor Plan Logic for a Narrow Room
A linear sequence means one item follows the next along the room’s length rather than items sitting across from each other. In an 8-foot-wide room, a standard 47-to-49-inch-wide power rack leaves roughly 45 to 49 inches of clear space beside it – just over the 36-inch walkway minimum that the NSCA specifies for main movement corridors4. That walking path beside the rack is not generous, but it is workable for a single-user home gym.
The arrangement typically runs: rack at one end (anchored to the far wall), bench in front of the rack, then open floor for stretching and accessory work, then cardio equipment at the near end closest to the door. This sequence puts the heaviest, most fixed equipment deepest in the room and keeps lighter, more storable items near the exit.
In rooms narrower than 7 feet, a full-size power rack becomes difficult to operate safely. A half rack, a folding wall-mounted rack, or a standalone pull-up bar with a separate bench works better. The narrower the room, the more valuable vertical wall space becomes: every item that mounts to the wall instead of sitting on the floor adds a usable walking path inch back.
Equipment Placement in a Narrow Room
Cardio equipment at the near end (closer to the door) rather than the far end gives you two benefits. First, you can enter the room, step onto the treadmill or bike, and warm up without navigating past the rack. Second, the emergency-dismount zone behind a treadmill projects toward the door rather than deeper into the room, where it would block rack access.
Wall mounting is not optional in a narrow room; it is the primary storage strategy. Dumbbell brackets, barbell wall holders, plate trees that mount vertically to studs, and resistance band hooks should cover as much of the long wall as possible. The NSCA notes that in home gym settings, the standard 3-foot safety cushion around aerobic machines is commonly reduced to an 18-inch safety cushion5. This compressed standard is what makes a treadmill workable in an 8-foot-wide room where a full 3-foot side clearance on both sides would consume all the walking space.
One room-first principle that applies especially to narrow spaces: measure the barbell’s loaded width before assuming the rack fits. A 7-foot Olympic barbell with collars extends roughly 84 inches, plus an inch or two on each side for collar width. In a room that is just 8 feet wide (96 inches), the loaded barbell clears the walls by only 6 inches per side when centered. That is tight. Consider a 6-foot barbell for narrow rooms, which gives 6 additional inches of side clearance per side while still handling most strength training loads.
Narrow room verdict: adopt a linear sequence with the rack at the far end and cardio near the door. Treat every wall as active storage. Width below 8 feet usually requires a compact or folding rack instead of a full power cage.
The Multipurpose Room: Zoned Layout with Clear Boundaries
The multipurpose room asks a different planning question: not just how to arrange gym equipment, but where the gym zone ends. Whether the room doubles as a home office, a guest bedroom, a playroom, or a living area, the gym portion needs a defined physical boundary. Without that boundary, equipment migrates outward over months, and the non-gym portion shrinks.
Floor Plan Logic for a Multipurpose Room
Allocate the gym zone before placing any equipment. Decide the square footage that belongs to the gym, and mark it – ideally with a flooring change (rubber mat or interlocking tile over the existing floor) that signals the zone visually and physically. Then apply the same layout logic as a square or narrow room within that zone, depending on its shape.
A gym zone in a multipurpose room is almost always smaller than a dedicated gym room of the same total square footage, because the non-gym area claims some of the floor. A 15-by-15-foot room dedicated to a home gym has 225 square feet to work with. The same room with a home office at one end might give the gym zone only 120 to 140 square feet. Plan to the gym zone’s actual dimensions, not the total room area.
The ACSM’s Health/Fitness Facility Standards and Guidelines recommends 25 to 50 square feet of floor space per piece of cardiovascular equipment3. In a multipurpose room where the gym zone is 120 square feet and a treadmill claims 45 square feet of that, only 75 square feet remain for a rack, a bench, and walking clearance. That math often rules out both a treadmill and a rack in a small multipurpose zone. Choosing between them early prevents an expensive re-arrangement later.
Equipment Placement in a Multipurpose Room
Equipment that folds, stores under a bed, or mounts to the wall reduces the gym zone’s footprint when not in use. A wall-mounted folding rack stores flat against the wall between sessions. A compact rowing machine folds upright and stores in a closet. An adjustable dumbbell set replaces a full dumbbell rack. These choices are not compromises for a multipurpose room; they are the correct equipment category for the space type.
Keep the gym zone’s storage entirely within the zone. Plates, bands, and accessories that migrate to the room’s non-gym side are early signs that the zone boundary is not working. Open shelving or a low bookcase placed along the zone boundary does two things: it creates a visible line between the gym side and the living side, and it provides in-zone storage without any wall anchoring.
Noise and vibration management matters more in multipurpose rooms than in dedicated gym rooms, especially when the room is shared with an office, a bedroom above, or a living space below. Rubber flooring within the gym zone absorbs impact. A dedicated deadlift platform within the zone reduces the vibration that transmits through the subfloor. For the planning sequence in a room shared with other uses, the article on home gym layout planning tools shows how digital floor planners can help you model zone boundaries before committing to equipment purchases.
One honest constraint: a multipurpose room with a ceiling fan, light fixture, or pendant in the center limits overhead barbell work in exactly the zone where you might want to train. Check ceiling fixtures before assuming a multipurpose room supports overhead pressing. A ceiling-height measurement at the rack’s planned position – accounting for the J-cup height plus the barbell diameter plus a minimum safety margin – should happen before any equipment enters the room.
Multipurpose room verdict: define the gym zone with a flooring change before placing equipment. Use foldable, wall-mounted, or compact equipment. Zone discipline – keeping all equipment and storage within the gym boundary – is what makes the arrangement sustainable.
What Equipment Space Standards Say About Small Home Gym Layouts
Two independent bodies publish the most-cited space standards for fitness environments: the NSCA (National Strength and Conditioning Association) and the ACSM (American College of Sports Medicine). Their figures were developed for commercial facilities but are widely applied to home gym planning as minimum reference points, particularly for clearance decisions.
The NSCA specifies that a treadmill requires 45 square feet of floor space including the surrounding clearance zone, a rowing machine requires 40 square feet, and a stationary bike or stair machine requires 24 square feet4. For free-weight areas, the NSCA calls for 36 inches of clear space between individual barbell or dumbbell stations, and 36-inch-wide main walkways around the perimeter4. The NSCA’s Chapter 23 of its Essentials of Strength Training and Conditioning states the following about per-participant space allocation for strength training environments:
“The recommended minimum amount of space per athlete is 100 square feet (9.3 m²) per participant.”
National Strength and Conditioning Association, Essentials of Strength Training and Conditioning, Chapter 234
This figure applies whether the training environment is a commercial facility or a residential gym. In 2024, a record 77 million Americans – 25% of those aged six and older – held a gym or studio membership8. For the majority who train at home, applying the NSCA’s 100-square-foot benchmark is the clearest starting point for understanding whether a given room can support a realistic strength training layout.
In home gym settings specifically, the NSCA’s CPT guidance acknowledges that the standard 3-foot safety clearance around aerobic machines is often reduced to 18 inches5. This reduced home standard reflects the lower-traffic, single-user nature of a private space. It does not, however, apply to the rear-dismount zone behind a treadmill: ASTM International’s standard F2115-12 requires 78 inches (2 meters) of clear space behind the belt’s rear roller for emergency exit6. That 78-inch rear clearance is non-negotiable in any layout.
What these standards reveal for small gym layouts is a ratio problem. A stationary bike requires 24 square feet. A strength training zone for one person requires 100 square feet. That 4-to-1 ratio means every room shape forces a sequencing decision: how much of the available floor area goes to strength work, and how much goes to cardio or mobility? The answer shapes the comparison table above and the layout choices in each room shape section.
These are engineering-informed planning references, not certified facility design standards for a residential project. The NSCA and ACSM figures were developed for commercial environments. Apply them as minimums and check your specific layout against the actual dimensions of your room and equipment before purchasing.
Choosing the Right Layout for Your Training Goals
Room shape narrows your options, but training intent determines which option to commit to. The three profiles below map common training goals to room shape decisions.
Strength-Focused Training: Square Room First
If your primary training is barbell work – squats, deadlifts, bench press, overhead press – the square room is the shape that serves you best. It gives the rack enough clearance on all sides for safe barbell paths, allows a proper bench position parallel to the wall, and leaves enough center floor for plate loading without repositioning. A 12-by-12-foot square room with a power rack, an adjustable bench, and wall-mounted dumbbell storage handles the full range of compound strength training for one lifter without significant compromise.
If a square room is not available and a narrow room is your only option, a wall-mounted folding rack reduces the footprint by storing flat when not in use. The trade-off is slightly reduced stability compared to a freestanding rack; for heavy squats and deadlifts, verify the folding rack’s rated load capacity before committing to it as your primary strength tool.
Mixed Cardio and Strength: Narrow Room with Zone Sequencing
A lifter who trains both cardio and strength regularly benefits from the narrow room’s linear sequence if the room is at least 14 to 16 feet long. The sequence runs: rack and bench at the far end, open floor for stretching in the middle, treadmill or rower near the door. This arrangement lets you move from cardio warm-up through stretching and into strength work without rearranging anything. The one constraint is the 78-inch rear clearance behind the treadmill6: that 6.5-foot zone must not overlap the stretching area or the rack’s barbell loading path.
Consumer fitness equipment sales grew 40.5% in 2020, with the home gym category specifically growing 73.7%2. Much of that growth went into compact cardio equipment – folding treadmills, compact rowing machines, and stationary bikes – specifically because buyers were working with narrow or multipurpose rooms. Compact cardio equipment with a smaller footprint is the right purchase category for a narrow room, not an afterthought.
Shared or Occasional Use: Multipurpose Room with Foldable Equipment
A person who trains two or three times per week and shares the room with another use – a home office, a guest bedroom, or a family room – needs the multipurpose room strategy. The gym zone should contain only the equipment used regularly; anything used once a month or less should be stored elsewhere. Adjustable dumbbells, a folding bench, a resistance band set, and a foldable cardio machine cover the majority of non-powerlifting training programs and store compactly when the room returns to its secondary function.
The global home fitness equipment market was valued at $12.88 billion in 20257, and a significant segment of that market is compact, foldable, and multipurpose equipment. That category exists precisely because multipurpose rooms are common and fixed, full-size gym equipment does not fit the lifestyle. Investing in compact-format equipment for a multipurpose room is not a downgrade; it is a correctly scoped purchase for the room type.
Frequently Asked Questions
What is the minimum room size for a small home gym?
The NSCA recommends 100 square feet per participant as a minimum for strength training4. In practice, a 10-by-10-foot room (100 sq ft) handles a compact rack and bench for one lifter with minimal walking clearance. A 10-by-12-foot room gives noticeably more usable space and is the more comfortable entry point for a rack-and-bench setup.
Can a narrow room work for a home gym?
Yes, but width is the limiting factor. A room at least 8 feet wide can accommodate a standard power rack with a 36-inch walking path beside it, which meets the NSCA’s minimum walkway standard4. Below 8 feet, a wall-mounted folding rack or a half rack is a better fit than a full power cage. Length matters more in a narrow room than width – aim for at least 12 to 14 feet of length for a rack-plus-cardio setup.
How much clearance does a treadmill need in a small room?
ASTM standard F2115-12 requires 78 inches (roughly 6.5 feet) of clear space behind the treadmill’s rear roller and 19.7 inches (0.5 meters) on each side6. The rear clearance is the hardest constraint to satisfy in a small room. Position the treadmill so its rear-dismount zone projects toward the room’s exit, never toward the rack or the center training area.
Should I put the rack in the center of the room or against a wall?
Against a wall, in almost every small room scenario. A wall-anchored rack uses one clearance zone instead of four, which preserves more usable floor space in front of and beside the rack. The rear upright typically sits 6 to 8 inches from the wall to allow weight plate clearance. A center-floor rack only makes sense in a large dedicated gym room where all four clearance zones can be satisfied simultaneously without restricting movement elsewhere.
How do I prevent gym equipment from spreading into the rest of a multipurpose room?
Use a physical zone boundary rather than an imaginary line. A flooring change (rubber mat or interlocking tile that stops at the zone edge), a low open shelving unit placed along the boundary, or a consistent furniture line all create a visual and physical barrier. Store all gym accessories within the zone. The moment a foam roller or resistance band migrates to the non-gym side, the boundary has started to fail.
Limitations and Edge Cases
- The NSCA and ACSM space figures in this article were published for commercial facility planning. Residential applications use them as minimum reference benchmarks, not as code-compliance standards for a home renovation.
- Ceiling height is not covered here. Overhead press, pull-ups, and cable machine use all require ceiling clearance that room shape alone does not determine. A room that is 8 by 12 feet with 7-foot ceilings is a different planning problem from the same footprint with 9-foot ceilings.
- Structural anchoring for wall-mounted racks and pull-up bars is outside this article’s scope. Wall type, stud spacing, and anchor load determine whether wall-mounted equipment is appropriate – and those decisions may require a contractor or structural assessment for your specific wall.
References
- CivicScience – “Four Fitness Trends to Watch in 2024,” CivicScience Consumer Research, January 17, 2024.
- SGB Media – “Home Fitness Paces Sporting Goods Gains Amid Pandemic,” citing SFIA Manufacturers Sales by Category Report, March 25, 2021.
- Power Systems Blog – “Simplify Your Space by Creating Training Zones,” citing ACSM’s Health/Fitness Facility Standards and Guidelines, July 23, 2018.
- PT Pioneer – “NSCA CSCS Chapter 23: Facility Design, Layout, and Organization,” study guide referencing NSCA’s Essentials of Strength Training and Conditioning, 4th edition.
- PT Pioneer – “NSCA CPT Chapter 24: Facility and Equipment Layout,” study guide referencing NSCA’s Essentials of Personal Training.
- CPH Insurance – “Placement of Treadmills: Consult Industry Standards,” David Herbert, J.D., citing ASTM International Standard F2115-12, June 15, 2016.
- Fortune Business Insights – “Home Fitness Equipment Market Size, Share and Industry Analysis,” updated July 20, 2026.
- Health and Fitness Association – “One in Four Americans Belonged to a Gym in 2024,” April 7, 2025.
Conclusion
Room shape is the constraint that decides your small home gym layout before the equipment list does. Square rooms support the most flexible arrangement because equal wall lengths let you pair the rack and cardio on opposite walls with clear floor space between. Narrow rooms require a linear sequence with the heaviest equipment at the far end and cardio near the door. Multipurpose rooms need a hard zone boundary and foldable equipment to stay functional over time.
The NSCA’s 100-square-foot minimum per participant and the ASTM’s 78-inch rear treadmill clearance46 are the two figures worth committing to memory before any equipment enters the room. Both tell you where the layout can fail before it happens.
For the full planning framework across layout variables beyond room shape, see the home gym layout overview.