
A 12×12 room gives you 144 square feet, enough for a power rack, a bench, a compact cardio unit, and wall storage, as long as you plan the zones in sequence rather than by feel. About one in five Americans had a home gym as of early 20241, and a large share of those setups end up with blocked walking paths and loading zones that fight each other. This article covers one angle of the broader home gym layout planning overview: how to fit every essential zone into 144 square feet without trading safety for space. Start with the room. Measure before moving anything.
Quick Answer
How do you fit a rack, bench, cardio, and storage in a 12×12 home gym?
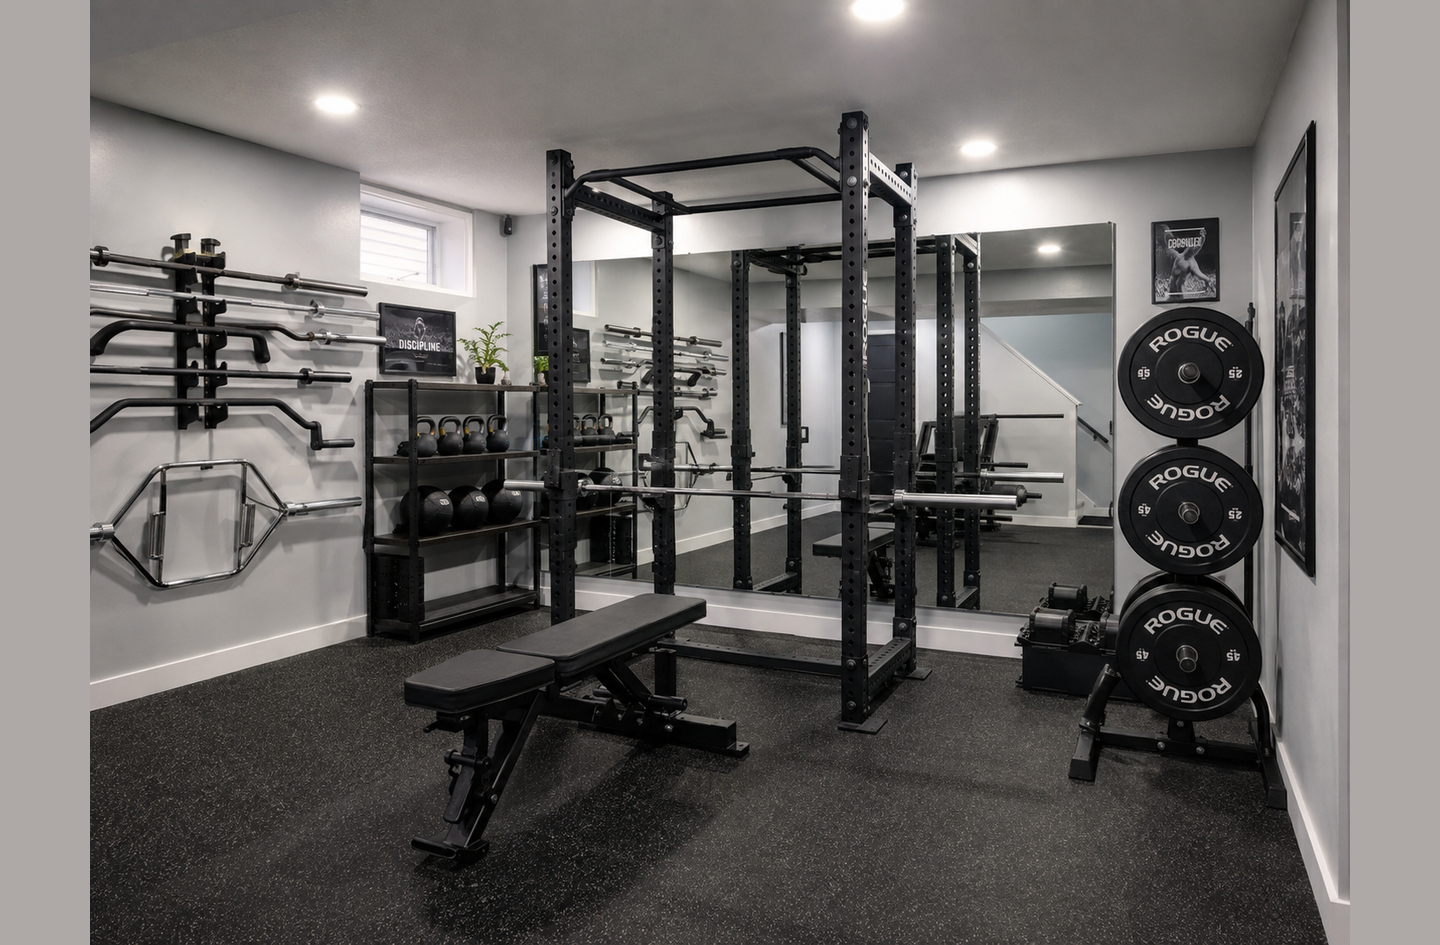
Position the power rack against the back wall, slide the bench inside the rack’s uprights to save floor depth, run the cardio unit lengthwise along one side wall, and mount plate storage vertically on the remaining wall. Keep a clear 36-inch path from the door to the rack. A men’s Olympic barbell measures 2.2 meters (about 87 inches) end to end6, which leaves 28 to 29 inches of side clearance in a 12-foot-wide room. That exceeds the 18-inch home gym minimum from the NSCA3, though it falls short of the 36-inch commercial standard.
Key Takeaways
- A 12×12 room is one of the most common home gym footprints. Allocate zones in order, or the walkway and loading clearance will disappear before you notice.
- A men’s Olympic bar is about 87 inches wide6. In a 12-foot room, each side of the bar has roughly 28 inches of wall clearance, which sits above the NSCA home gym minimum of 18 inches3 but below the 36-inch commercial standard.
- The most common 12×12 mistake is placing the cardio unit in front of the rack instead of along the side wall. That choice consumes the walkway and forces you to walk through the loading zone to reach the bar.
- Wall-mounted storage is the single biggest floor-space multiplier in a room this size. Plates on floor trees block walking paths. Plates on the wall do not.
What to Measure Before Moving a Single Piece of Equipment
Planning the 12×12 layout on paper before moving anything is faster than disassembling blocked paths afterward. Before you draw a single zone, gather four measurements from the room itself.
- Exact room dimensions: Measure all four walls at floor level. Note any alcoves, support columns, HVAC vents, or electrical panels. A column 18 inches from the corner changes every calculation around it.
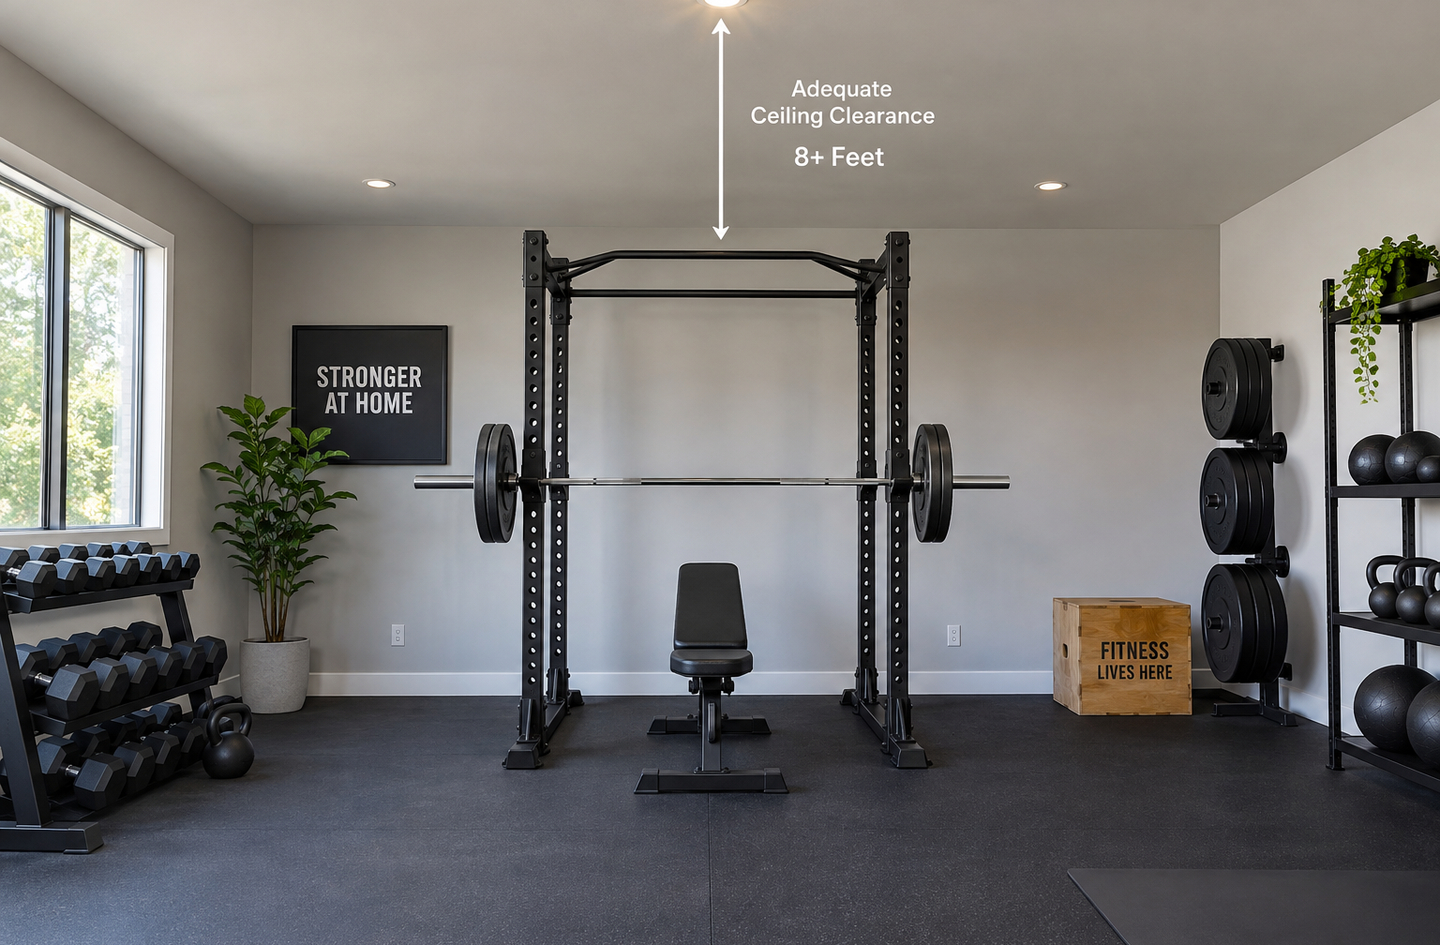
- Ceiling height: Measure at the center of the room and at the point directly above where the rack uprights will stand. Overhead press from inside a power rack requires at least 8.5 feet of clear ceiling for most lifters. Some racks reach 90 inches tall on their own.
- Door swing and window locations: A door that opens inward can block 4 to 6 square feet of floor when fully open. That space is not available for equipment.
- Each piece of equipment’s footprint: Look up the manufacturer’s spec sheet for each item you plan to include. Approximate dimensions are not enough when the margin is 12 inches or less.
The table below shows the footprints used in this layout guide. These are representative dimensions for common home gym equipment in the 12×12 class. Your specific models may differ by a few inches, so confirm against the spec sheet before committing to a position.
| Equipment | Footprint (inches) | Footprint (sq ft) | Placement note |
|---|---|---|---|
| Power rack (e.g., REP PR-1050 type)5 | 48″ deep x 58″ wide | ~19 sq ft | Against back wall |
| Adjustable bench | 50″ long x 12″ wide (pad) | ~4 sq ft | Inside rack uprights (saves depth) |
| Rowing machine (folded flat) | 96″ long x 24″ wide | ~16 sq ft | Lengthwise along side wall |
| Upright stationary bike | 46″ long x 20″ wide | ~6 sq ft | Side wall or front corner |
| Vertical plate tree | 18″ x 18″ | ~2 sq ft | Against wall, never in walkway |
Once you have those measurements, arrange the zones from the most constrained to the least. In a 12×12 room, the rack zone controls everything. Place it first. Build the rest of the layout around it, and note the overall movement flow as discussed in the workout room layout guide.
Step 1: Mark the Rack Position Against the Back Wall
By the end of this step, you will know the exact position on the back wall where the rack stands, and you will have confirmed that a loaded barbell fits safely across the room’s full width.
A power rack is a four-post steel frame that holds a barbell at adjustable heights, allowing safe solo training at any weight without a spotter on the bench or standing behind the squat.
The rack goes against the back wall because it anchors the room’s heaviest load at the point farthest from the entry. Every other zone falls in front of it, closer to the door, so you always walk toward the rack rather than around it.
How to position the rack in a 12-foot-wide room
A men’s Olympic barbell is 2.2 meters (about 87 inches) end to end6. A 12-foot room is 144 inches wide. After you subtract the barbell’s full span, you have 57 inches of combined side clearance, or roughly 28 to 29 inches per side.
The NSCA sets a home gym safety cushion of 18 inches3, so 29 inches per side satisfies that standard with about 11 inches to spare. Center the rack, and that margin is roughly equal on both sides. Push it toward one wall, and one side shrinks below the 18-inch minimum.
For practical verification: stand at the rack with the barbell seated in the j-cups, hold the bar at full extension, and confirm the sleeves clear each wall by at least 18 inches. If they do, the position holds. If not, adjust before loading any weight.
Rack depth and back-wall clearance
The rack itself is typically 48 inches deep from front to back5. Placed flush against the back wall, the front edge of the rack extends 48 inches into the room, or exactly 4 feet. That is the fixed depth you cannot recover. Plan the remaining 8 feet of depth around the 4-foot rack zone.
You do not need clearance behind the rack when it sits against a solid wall. What you need is clearance in front, for the bench, the loading zone, and the walkway. That is where a 12×12 room requires disciplined sequencing.
In a 12-foot-wide room, centering the rack is not a style choice. It is the only position that keeps both barbell sides above the minimum safety clearance while preserving usable space on both walls for storage or a cardio unit.
Step 2: Nest the Bench Inside the Rack Footprint
By the end of this step, the bench is positioned and you have confirmed that the bench-plus-rack zone claims no more than 4 to 4.5 feet of room depth total.
A standard adjustable bench is about 50 inches long and 12 inches wide at the pad. Most power racks measure 48 inches between the front and rear uprights. If you slide the bench between the uprights with the head toward the back of the rack, the bench pad sits fully within the rack’s existing footprint. The bench adds nothing to the room’s depth claim and almost nothing to its width claim.
Why nesting the bench matters in a 12×12 room
When the bench lives outside the rack, it adds another 4 feet of depth in front of the rack zone. That pushes the remaining working zone, walkway, and cardio area into roughly 4 feet of total depth, which is not workable for most exercises. Nesting eliminates that depth penalty entirely.
The practical trade-off is that you slide the bench out to bench-press and then return it after each set, rather than leaving it permanently outside the rack. The slide adds one brief step per set. For most home gym users, that trade is worth reclaiming an extra 4 feet of floor.
What the rack zone looks like after both placements
Rack at 48 inches deep, bench inside, upright of the rack at the back wall. The rack zone extends from the back wall to 48 inches into the room, or 4 feet. You now have 8 feet of remaining room depth for the working zone, the walkway, and the cardio station combined. Every subsequent step fits inside that 8 feet.
Step 3: Route the Cardio Unit Along the Side Wall
By the end of this step, the cardio unit is positioned against a side wall running lengthwise front to back, and its footprint does not intersect the walkway or the loading zone.
Cardio placement is the decision most 12×12 layouts get wrong. The instinct is to put the treadmill or rower in front of the rack at the far end of the room. That instinct costs you the walkway. The correct position is not in front of the rack, but beside it, running parallel to the room’s long axis along the side wall.
Choosing between a rower, bike, and treadmill
A rowing machine running lengthwise along a side wall occupies about 96 inches long by 24 inches wide, which is 16 square feet. Because it runs parallel to the room depth rather than across it, the rower claims only 24 inches of width from the side wall. That leaves the remaining 9 feet of room width intact for the rack zone and the walkway. The rower also folds to roughly half its length when not in use, reducing the footprint further.
An upright stationary bike is shorter (about 46 inches) and narrower (20 inches). It fits in the same side-wall position with less wall coverage. If ceiling height is a constraint and the rower would extend past the rack zone into a low-hanging duct or beam, the bike is the safer choice.
A full-size treadmill, at 75 inches long by 35 inches wide, pushes into the walkway from the side wall unless the room has no other equipment sharing that wall. In a 12×12 room with a power rack and wall storage, a full-size treadmill leaves fewer options. A compact folding model at 65 by 28 inches is workable; a full commercial-width machine is not.
Confirming the cardio-to-rack clearance
The NSCA recommends that aerobic machines have at least 3 feet of clear space on all sides in a commercial facility3. In a home gym, the home-gym minimum of 18 inches applies to the side toward the wall, but the side facing the walkway should stay at 36 inches to keep the central walking path clear.
When the rower runs along the side wall with 24 inches of width, the walkway on the other side of the rower needs at least 36 inches. That means the rower’s side wall to the opposite walkway edge spans 60 inches (5 feet). In a 12-foot-wide room, you have 144 inches total. Rack zone at roughly 60 inches wide (including barbell side clearance), rower at 24 inches, and walkway at 36 inches: 60 plus 24 plus 36 equals 120 inches. That leaves 24 inches for the storage-side wall, which is enough for a vertical plate tree or narrow shelving.
Placing cardio in front of the rack is a depth trap. Routing it lengthwise along the side wall converts a depth problem into a width problem, and the 12-foot width has enough room to spare.
Step 4: Mount Storage to the Walls, Not the Floor
By the end of this step, every significant weight plate, barbell, and accessory has a dedicated wall position, and the floor footprint of storage items is under 4 square feet total.
Wall-mounted storage refers to any rack, hook, bracket, or post that transfers the weight of plates, barbells, or accessories from the floor to a wall-anchored fixture. That shift returns the floor footprint entirely to open walking and training space.
In a room where the floor is already divided between the rack zone, the cardio station, and the walkway, a floor-standing plate tree or barbell rack occupies 2 to 4 square feet at a location that matters. Wall storage takes that 2 to 4 square feet back.
What to wall-mount first
Weight plates are the most important item to lift off the floor. A full set of Olympic plates needs a floor tree that typically measures 18 by 18 inches. Mounted on the wall at the same location, that footprint drops to 0. Horizontal plate posts, angled plate sleeves, and vertical plate holders all work, but any of them requires the right wall substrate. Drywall alone does not hold that load. Confirm stud spacing and attach to structural framing before hanging any plate storage. If the wall substrate is uncertain, this is the decision to verify with a contractor before installation.
Barbell and accessory storage
A 7-foot barbell is 87 inches long. Stored horizontally on wall hooks, it claims 87 inches of wall width and nothing on the floor. Stored vertically in a floor-standing holder, it claims a 6-by-12-inch floor footprint plus a height of 87 inches, which is workable but one more floor item to route around. Horizontal wall storage is the cleaner solution in a 12×12 room where every floor square foot is already claimed.
For accessories including kettlebells, bands, and collars, a simple wall-mounted shelf at shoulder height keeps them accessible without consuming floor space. Anything that sits on the floor and is not actively in use during a set is a tripping risk and a walking-path hazard in a room this size.
“Dumbbells and barbells need to have a minimum 36 inches between other dumbbells and barbells.”
National Strength and Conditioning Association, CSCS Facility Design Guidelines, Chapter 232
That 36-inch standard applies to commercial facilities. In a home gym with a single barbell on wall hooks, the distance between any two stored barbells is likely the full length of the wall, which makes the standard easy to meet. The principle behind it, keeping heavy items separated so that loading one does not put a lifter within range of another, still applies even when you have only one bar.
Step 5: Walk and Verify Every Clearance Path
By the end of this step, you have physically walked each clearance path in the room and confirmed that no equipment, plate, or accessory encroaches on a path needed for safe training or emergency exit.
A walkway spine is the continuous, unobstructed corridor that connects the room entrance to every piece of equipment in a single clear path. In a home gym, the walkway spine runs from the door to the front of the rack, and secondary branches reach the cardio unit and the storage wall without crossing the loading zone.
“the clear width of walking surfaces shall be 36 inches (915 mm) minimum.”4
U.S. Access Board, ADA Standards for Accessible Design, Section 403.5.1
The 36-inch minimum applies to commercial accessible routes, and the NSCA echoes it for gym walkways2. In a home gym where a single person trains solo, 30 inches is physically walkable. But 36 inches gives you enough width to carry a loaded barbell sideways, to exit quickly under load, and to step around dropped equipment without clipping a wall or a machine.
Walking the clearance test
Start at the room door. Walk to the rack in a straight line. Count the inches of clear floor on each side of your path. Note any point where that width drops below 36 inches. Then walk from the rack to the cardio station and back. Finally, simulate loading a plate onto the barbell: stand at each sleeve end with your arms extended and a plate in your hands, and confirm no wall or other equipment is within range of a dropped plate.
This is the physical verification step. A measured floor plan catches most conflicts. Bodies move differently than tape measures. A stacked plate tree that looks fine on paper often ends up blocking exactly the step you take when un-racking a bar.
Secondary clearance checks
Beyond the walkway, confirm three more clearances. Check overhead clearance at the highest point of the bar path during overhead press. Check that the door can swing fully open. Verify cardio clearance: at least 18 inches behind the rear of a treadmill and at least 24 inches beside the rower’s full sweep. For detailed clearance planning, the home gym traffic flow guide covers walking path design across different equipment configurations.
Physical verification catches what a floor plan misses. Walk it before loading the bar, and walk it again after every equipment change. The room that passed the clearance test last month may not pass it after you added a second rack of dumbbells along the side wall.
Common Mistakes in a 12×12 Home Gym Layout
Most 12×12 home gym problems trace back to one of five planning decisions made before the first piece of equipment was moved.
Placing cardio in front of the rack
A treadmill or rower placed at the front wall, directly in front of the rack, occupies the only unallocated depth. The walkway disappears. The loading zone is now behind the cardio unit, which forces a lifter to walk around the machine to access the bar. Route cardio along the side wall instead.
Using a full-size treadmill in a 12×12 room
A full-size treadmill at 75 by 35 inches occupies 18 square feet and its safety cushion adds another 9 square feet behind the belt. That 27-square-foot minimum is workable in isolation but not alongside a rack, a bench, and wall storage. A compact folding treadmill at 65 by 28 inches is the largest machine a 12×12 layout can absorb without compromising another zone. If running is a training priority, consider a treadmill-only layout without the rack, or use a different room for cardio.
Forgetting barbell side clearance
The barbell is 87 inches wide6. Centering the rack in a 12-foot room leaves 28 inches per side. If a storage unit or cardio machine encroaches on one side, that clearance shrinks below the NSCA home gym minimum of 18 inches3. Map the barbell’s full 87-inch span on the floor before placing anything along the side walls at rack height.
Leaving plates on floor trees in the loading zone
A floor plate tree in the loading zone sits directly behind or beside the working lifter. During a bail, plates dropped or slid off the bar land in the same area as the tree. Wall-mounted plate storage keeps the loading zone clear and reduces the number of hard surfaces near a falling bar.
Planning the layout once and treating it as final
A 12×12 room with a power rack looks different after you add a second set of kettlebells, a plyometric box, or a cable attachment that doubles the rack’s depth. Treat the initial layout as the first version and revisit the clearance test after each significant addition. What fits at setup may not fit after the third month of equipment growth.
What the Finished Layout Looks Like
When the five steps are complete, the 12×12 room has a clear structure. The back 4 feet belong to the rack and bench. The next 3 feet belong to the working zone, where you load plates, perform deadlifts, and step back after un-racking a bar. The central 3 feet run the length of the room as the walkway spine, clear from door to rack. The side wall holds the cardio unit running front to back along its 8-foot length. The opposite side wall carries plate storage, barbell hooks, and a narrow shelf for accessories.
Total floor footprint of equipment: roughly 60 to 70 square feet. Total dedicated but unencumbered zones (walkway and working zone): roughly 54 to 64 square feet. That distribution is tight. It leaves almost no room for a second rack, a cable system, or a dumbbell wall. But it is a complete training room: strength, cardio, and organized storage in a 12×12 room, without sacrificing the clearances that keep training repeatable and safe.
If your layout needs a planning tool, the home gym layout planner tool comparison covers free apps that draw the room to scale, drop in equipment footprints, and verify clearances. Use one before moving anything.
Frequently Asked Questions
Can you fit a power rack and a treadmill in a 12×12 home gym?
A compact folding treadmill (about 65 by 28 inches) fits alongside a power rack in a 12×12 room when the treadmill runs along the side wall lengthwise, rather than in front of the rack. A full-size model at 75 by 35 inches is workable only if the rack is compact and all plates move to wall storage. If running is the primary cardio goal, a treadmill-only room without the rack is often the cleaner layout.
What is the minimum ceiling height for a 12×12 home gym with a power rack?
A standard power rack stands 84 to 90 inches tall. Overhead press from inside the rack adds another 12 to 18 inches to the bar path at full extension. A ceiling height of at least 102 inches (8.5 feet) gives adequate clearance for most lifters performing overhead press. Check the specific rack height from the manufacturer’s spec sheet and add your overhead reach before committing to a model for a lower-ceiling room.
Should the bench be inside or outside the rack in a 12×12 room?
Inside the rack. Sliding the bench between the uprights keeps it within the rack’s existing 48-inch depth footprint and adds no additional room depth to the rack zone. Placing the bench in front of the rack instead adds roughly 4 feet of depth, which eliminates the walkway and the cardio zone in a room where total depth is only 12 feet.
How much side clearance does a barbell need in a 12×12 room?
A men’s Olympic bar is about 87 inches (2.2 meters) wide6. In a 12-foot (144-inch) room, centering the bar leaves roughly 28 to 29 inches of side clearance per wall. The NSCA home gym safety minimum is 18 inches3. That gives you 10 to 11 inches of margin above the minimum, which is workable for solo training but leaves little room for side-wall equipment at rack height.
What is the best cardio equipment for a 12×12 home gym?
A rowing machine running lengthwise along the side wall is the most space-efficient choice, using 24 inches of width and offering a full-body cardio workout. An upright stationary bike (about 20 inches wide, 46 inches long) is a more compact alternative. Both fit without consuming walkway depth. A compact folding treadmill works if running is a training priority, but confirm the unfolded length against your available side-wall dimension before purchasing.
Limitations and Edge Cases
- This layout covers a single-rack setup for one primary lifter. A shared-use gym or a second full-size rack requires a larger room or a fundamentally different zone plan.
- Dimensions assume a standard men’s 7-foot Olympic barbell (87 inches wide). A women’s bar at 79 inches returns 4 more inches of side clearance per side. A shorter specialty bar changes the width calculations in kind.
- For a 10×12 room, the same zone-first approach applies with tighter margins: see the 10×12 home gym layout guide for that specific case.
- For rooms with an unusual shape including L-shaped footprints, support columns, or alcoves, the small home gym layout ideas by room shape covers how room geometry changes zone planning.
References
Methodology: every figure below comes from an independently published source and links to the page carrying it; the article applies engineering and renovation planning methodology against standard equipment specifications and professional facility design guidelines.
- Statista – Most common fitness investments in the United States 2024, January 2024 survey data.
- PT Pioneer – CSCS Chapter 23: Facility Design, Layout, and Organization (National Strength and Conditioning Association standards summary).
- PT Pioneer – NSCA CPT Chapter 24: Facility and Equipment Layout (home gym clearance minimums and aerobic machine spacing).
- U.S. Access Board – ADA Standards for Accessible Design, Chapter 4: Accessible Routes, Section 403.5.1, walking surface clear width requirement.
- REP Fitness – Rack Dimensions Guide: footprint specifications for REP Fitness power rack models including the PR-1050 (48″ deep x 58″ wide).
- Wikipedia – Barbell: IWF standard men’s Olympic barbell dimensions and weight specifications, 2.2 metres (87 inches) total length.
Conclusion
A 12×12 home gym works when you allocate zones before moving equipment. The rack anchors the back wall, the bench nests inside it, the cardio unit routes along the side wall, and storage moves off the floor onto wall fixtures. Each zone fits because you planned it in sequence, not because the room is generous with space.
Walls before racks, storage before floor clutter, clearance before the first heavy set. For the full context of how this layout decision fits within home gym planning, see the home gym layout overview for the broader picture.