
Equipment gets planned first; the walking paths come last. That ordering mistake shows up in injury data: in 2024, exercise and exercise equipment led all U.S. sports and recreation injury categories with an estimated 564,845 emergency-department visits1. Obstructed loading paths and blocked transitions contribute every time a lifter routes around a misplaced plate tree or steps over a dumbbell on the way to the rack. This article is the traffic-flow spoke in the home gym layout overview. It explains how to position the rack, bench, cardio equipment, and storage so every home gym layout path stays unobstructed from door to barbell.
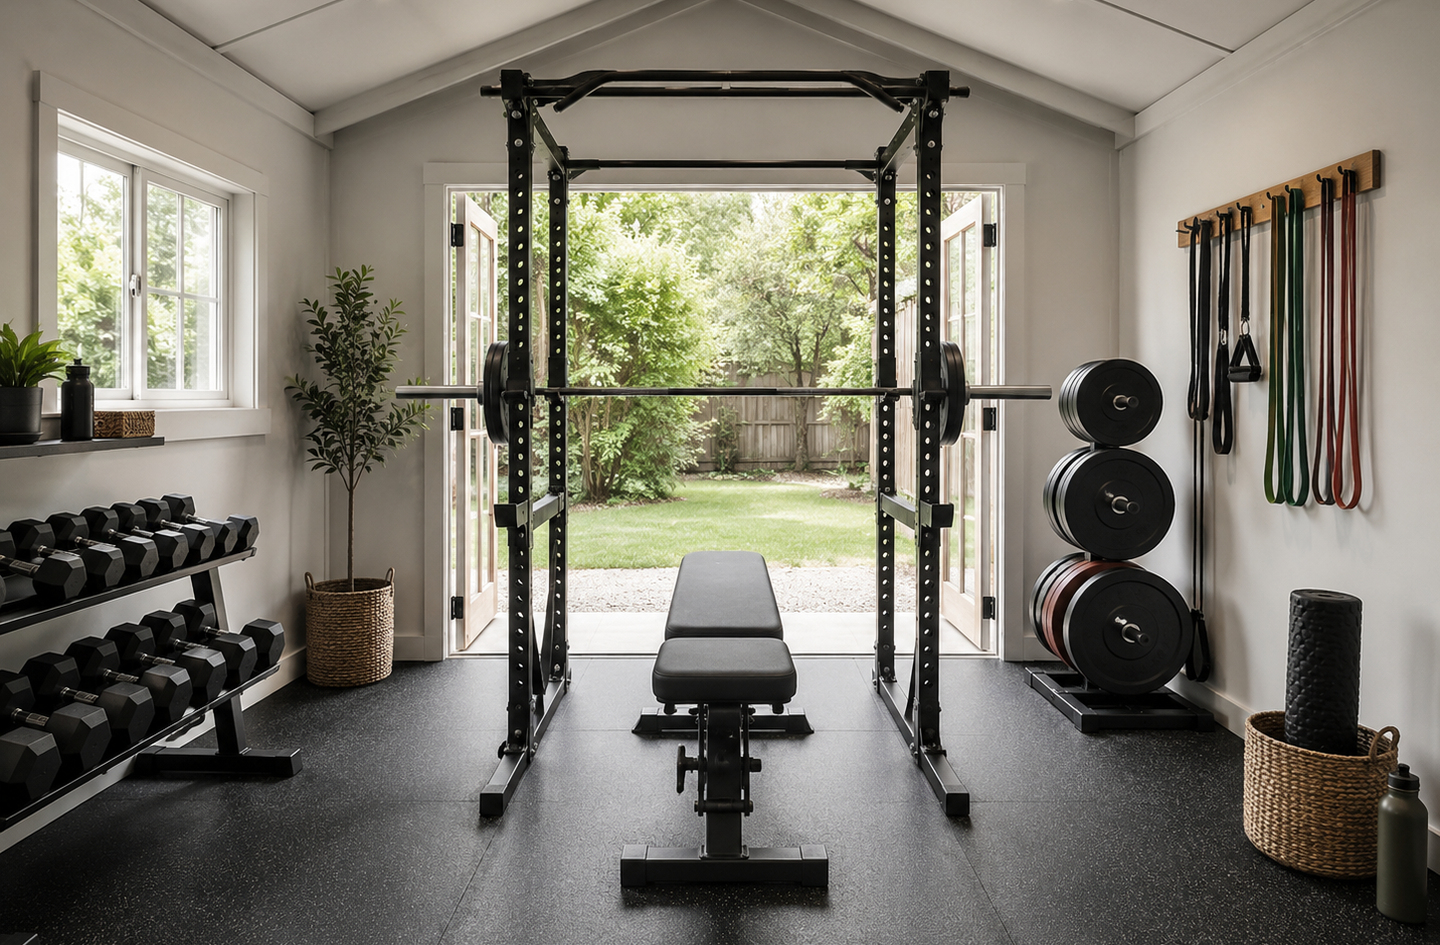
Quick Answer
How do you plan clear walking paths in a home gym layout?
Position the rack first – it is the largest fixed anchor and determines every other path. Then place the bench along the rack’s loading line, set cardio equipment at the room’s perimeter (a treadmill needs 78 inches of clear space behind it3), and route storage to walls and corners. The NSCA sets the minimum for main training walkways at 36 inches2. Walk every transition path carrying a weight before finalizing any position.
Key Takeaways
- NSCA facility design standards set the main training walkway minimum at 36 inches and recommend 36 inches of clearance around a power rack2.
- ASTM F2115-12 requires 78 inches of clear space behind a treadmill – the largest single clearance requirement in any home gym3.
- The rack is the traffic anchor. Place it first; every other piece positions around it.
- Storage routed to walls and dead corners (behind doors, deep corners) reclaims floor space without removing equipment.
- Trips and falls account for 12.5% of fitness facility injuries6 – walking every path with a weight in hand before finalizing equipment positions catches those hazards before they cause problems.
Before You Begin: Measure Your Paths
Clear traffic flow is a structural decision, not a finishing touch. Before any equipment moves, the room needs to be measured against the clearance standards that make training repeatable and safe. What those standards require is more specific than most planning guides acknowledge.
The NSCA publishes facility design guidance that specifies minimum clearances for training environments. Its figures for commercial spaces translate directly to home gyms as planning benchmarks, though the NSCA also notes that in constrained home settings the absolute minimum access cushion drops to 18 inches for pathways used only for equipment access – not for active training2. The 36-inch standard for main training walkways remains the right target for the paths a lifter walks during a session.
| Training Area | Minimum Clearance | Standard |
|---|---|---|
| Main training walkway | 36 in | NSCA2 |
| Around power rack (all sides) | 36 in | NSCA2 |
| Between resistance machines | 24 in minimum, 36 in ideal | NSCA2 |
| Treadmill – each side | 19.7 in (0.5 m) | ASTM F2115-123 |
| Treadmill – rear safety zone | 78 in (2 m) | ASTM F2115-123 |
| Home gym equipment access path | 18 in (absolute minimum) | NSCA home guidance2 |
What you will need before placing any equipment:
- A 25-foot tape measure
- Colored floor tape or painter’s tape to mark clearance zones
- A note of every door swing, window, wall outlet, and overhead obstruction
- A rough sketch of the room with dimensions (a free digital floor plan tool helps here – see home gym layout planner tools for a comparison of features)
- Estimated time: 30 to 60 minutes for a standard 150 to 300 square foot space
Once measured, mark the 36-inch corridors with floor tape before moving any equipment. The tape makes it immediately visible when a proposed rack position would close off a path.
Step 1: Place the Rack as the Traffic Anchor
By the end of this step you will have a confirmed rack position that leaves 36 inches of clear path on all working sides and a safe bail-out zone behind the rack.
The power rack is the largest, heaviest, and least movable piece in a home gym. Its position does not just determine where squats happen – it determines where every other walking path runs. Position it wrong and the entire room’s flow compounds the mistake. Position it correctly and the remaining equipment slots around it with much less friction.
A loaded 7-foot barbell extends approximately 86 inches between the outermost collars on 45-pound plates. The room needs to accommodate the rack footprint, the barbell’s lateral reach, and the 36-inch walking clearances on the sides where a lifter steps during a walkout or a squat set.
How Much Space Does a Power Rack Need?
NSCA facility design guidance specifies 36 inches of walkable clearance around a power rack2. That means the rack’s footprint plus 36 inches on both sides, 36 inches in front, and 36 inches behind – before any other equipment is introduced. In a room 10 feet wide, a 48-inch-wide rack leaves 72 inches (6 feet) of remaining lateral space split across both sides. Dividing that evenly gives 36 inches per side, which exactly meets the minimum. Any other piece placed in that lateral strip closes the path.
The 36-inch rear zone serves a different function than the side clearances. It is the bail-out zone: the space a lifter needs if a squat or bench press goes wrong and the bar has to drop. Placing a plate tree, a cable attachment, or a storage shelf immediately behind the rack’s rear uprights removes that zone. When anchoring the rack to the floor or wall is part of the plan, have a qualified contractor evaluate the floor and wall structure before installation – anchoring requirements vary by rack model, floor type, and wall construction.
The Loading Triangle
Plate loading follows a repeating triangle: from the plate storage to the rack sleeve, and back. If any obstacle sits inside that triangle – a bench leg, a dumbbell left on the floor, the corner of a storage shelf – the loading path requires a detour on every single set. Over a training session that detour happens dozens of times. The plate tree or wall-mounted plate storage should sit on the same wall as the rack’s loading end, close enough that the lifter can reach both without walking more than a step or two. The NSCA notes that platforms and racks should be 3 to 4 feet apart2 – that same principle applies to the relationship between the rack and its plate storage.
Step 2: Position the Bench Along the Loading Line
By the end of this step the bench position will allow bench press, dumbbell work, and cable rows without the bench blocking the rack’s bail-out zone or the plate loading path.
The bench has two common configurations in a home gym: inside the rack’s footprint (for bench press) or free-standing near the rack (for dumbbell rows, incline work, or step-ups). Both require the same consideration: the bench’s orientation determines which paths stay open and which get blocked.
A standard flat bench is 47 to 52 inches long. When positioned inside a rack for pressing, the rack footprint determines its placement. The critical variable is the bench’s head end: at least 24 inches of clear floor is needed there for entry, exit, and unracking. A plate tree or shelf blocking that end closes the only exit from the press position.
Bench Orientation and Diagonal Dead Zones
A bench placed at a 45-degree angle to the wall looks dynamic in a photo. In a working home gym it creates two triangular dead zones on either side – unusable floor space that a straight orientation would leave clear. The NSCA recommends keeping dumbbells and barbells at least 36 inches apart2. A diagonally oriented bench makes it harder to achieve that clearance on all sides because the dead zones shrink the usable rectangle around it. Parallel orientation to the nearest wall maximizes usable floor space on all four sides and creates the straightest path between the bench and the dumbbell rack or plate storage.
When the bench is used outside the rack for dumbbell work, the dumbbell rack should be on the same wall as the bench’s foot end. The lifter picks up the dumbbells, walks one step to the bench, sits, and lowers into position without crossing any other path. If the dumbbell rack is behind the bench’s head end, the lifter must carry loaded dumbbells in front of their body while stepping over or around the bench – a grip-failure hazard before the set even begins.
Step 3: Set Cardio Equipment at the Perimeter
By the end of this step every cardio piece will be positioned at the room’s perimeter, its required clearance zones confirmed, and the center of the room kept free for strength work and transitions.
Cardio equipment has the largest mandatory clearance of any gym category – and the clearance requirement that most home gym owners underestimate. A treadmill is not just the machine’s footprint; it is the machine plus a 78-inch (6.5-foot) safety zone behind the rear roller. ASTM F2115-12, the standard for treadmill safety, sets that rear zone as the minimum clearance for access, passage, and emergency dismount3.
“The provided measurements are the minimum clearance required for access to, passage around, and emergency dismount from the treadmill.”
The Redwoods Group, Spacing of Fitness Equipment4
In a 10-foot-wide room, a treadmill deck (typically 55 to 65 inches long) plus its 78-inch rear zone requires more than 11 feet of total depth – more than the entire shorter room dimension. The treadmill must go along the longest unobstructed wall, with its rear zone running parallel to that wall rather than cutting across active training space.
Stationary bikes and rowing machines have smaller rear clearance requirements (typically 18 to 24 inches behind and 18 inches to each side), but they still occupy significant floor space. Placing them in the center of the room fragments the training space into disconnected zones that each become too small to be useful. At the perimeter they back up to a wall, leaving the center open for rack work, warm-up, and transitions.
Step 4: Route Storage to Walls and Dead Corners
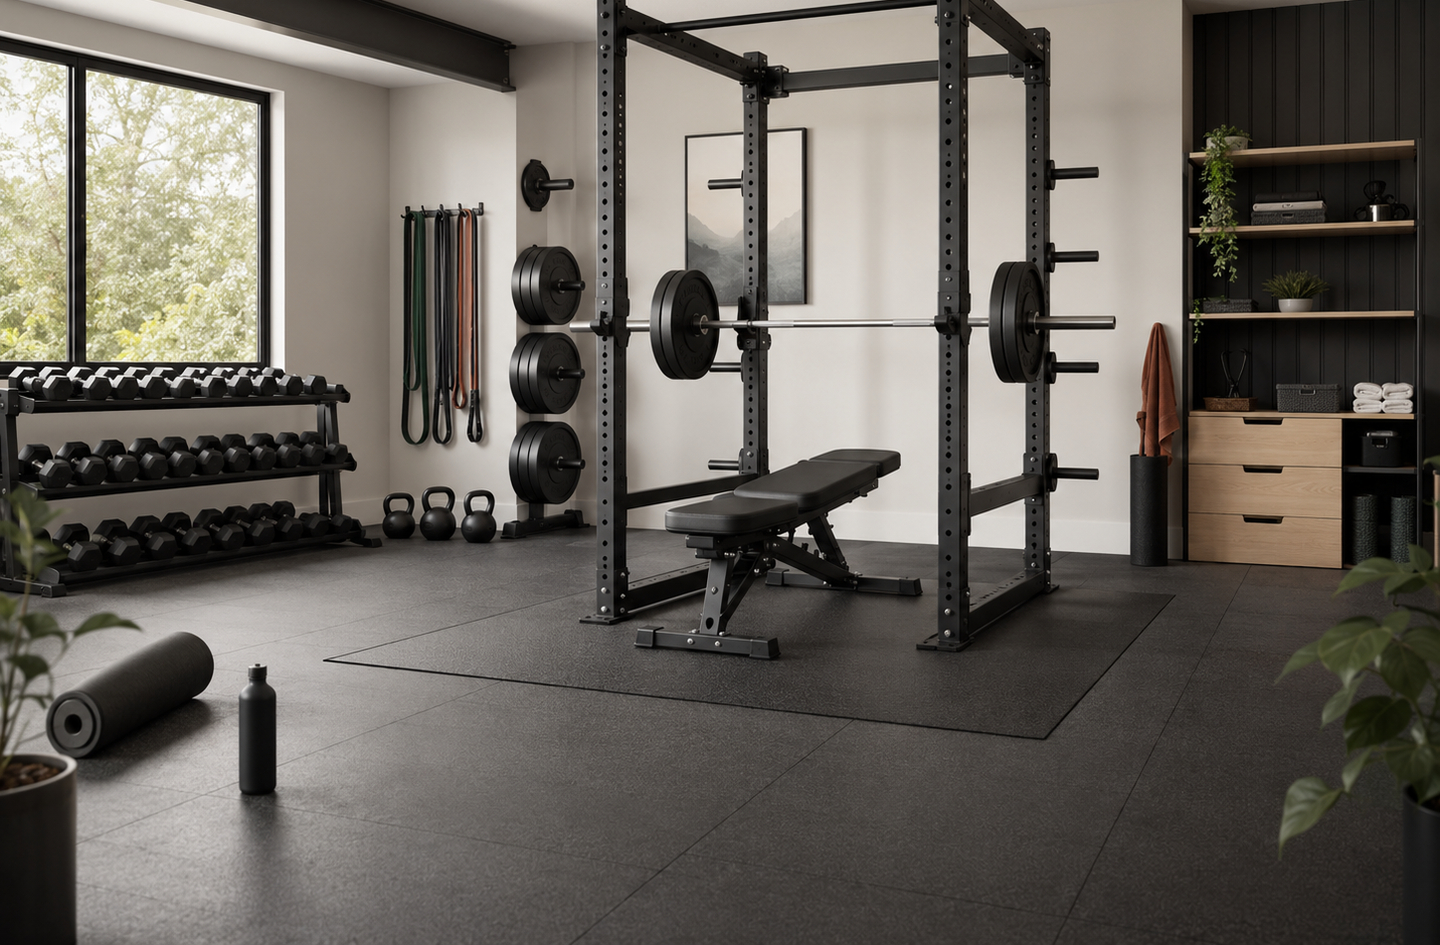
By the end of this step every storage piece will be positioned against a wall or in a corner, with clear 36-inch access aisles in front, and nothing protruding into a training path.
Storage placed on the open floor is the single most common source of blocked paths in a home gym. A plate tree positioned two feet from the rack’s loading end looks efficient on paper. In practice it cuts the bail-out zone behind the rack and creates a collision hazard during high-rep squat sets when a lifter steps back involuntarily. Storage belongs on walls and in the room’s “dead zones” – the spaces behind door swings, in deep corners, and beneath high windows – where training activity never naturally occurs.
Where Does the Plate Tree Go?
The plate tree’s position should be on the same wall as the rack’s loading end and within arm’s reach of the rack sleeve. A lifter loading a barbell takes the plate off the tree with one hand, steps to the sleeve, slides the plate on, and steps back. That sequence should be a straight line. When the plate tree is on the opposite side of the room, the lifter carries a loaded plate across the training floor – past the bench, past the dumbbell rack – on every set change. Keeping the plate tree and the rack on the same wall, or on adjacent walls within six feet of each other, eliminates that hazard entirely.
The plate tree must not sit inside the rack’s rear clearance zone. Apply the same gap the NSCA specifies between platforms and racks (3 to 4 feet2): close enough to reach the sleeve easily, far enough that the bail-out zone stays open. Wall-mounted plate storage eliminates the conflict entirely since the plates live on the wall, not the floor.
Dumbbell racks follow the same logic: along the wall with a 36-inch aisle in front. That aisle gives enough room to hinge, grip, stand, and step to the bench without the bench occupying the movement space behind you.
Resistance bands, collars, chalk bags, foam rollers, and accessories should be stored below knee height or on wall hooks, never left on the floor in a transition path. A foam roller on the floor in a dim gym during an early-morning session is a tripping hazard. Keeping accessories on a shelf or pegboard removes them from the floor entirely. The OSHA minimum for a walkway used only for equipment access is 18 inches5 – but that floor is for access paths, not for training paths. Training paths need the full 36 inches.
“A minimum width of 18 inches is acceptable for a walkway used for maintenance and gaining access to equipment and would comply with the intent of Section 1910.37, OSHA General Industry Standards.”
U.S. Occupational Safety and Health Administration, Standard Interpretation Letter (29 CFR 1910.37)5
Storage layout is also where the room’s “dead corners” earn their place in the plan. The corner diagonally opposite from the door is the one corner a lifter almost never walks through during a session. Plate storage, a medicine ball bin, or a gear shelf tucked there removes it from every active path. The corner near the door is different: lifters pass through it at every entry and exit. Keep that corner clear.
Step 5: Walk Every Path Before You Train
By the end of this step you will have confirmed, with your body moving through the space, that every transition path clears 36 inches and that no stored item creates a trip hazard.
A floor plan sketch verifies dimensions. Walking the room verifies the experience. The two are different checks. A plan can show 38 inches of clearance between the bench leg and the dumbbell rack, but if the dumbbell rack’s lower tier protrudes 4 inches past the rack upright at ankle height, that 38 inches becomes 34 at the floor – and a loaded collar left on the floor makes it 30. Walking the actual space finds those discrepancies before they become injuries.
Walk each of these five transitions with a weight in hand – a single 45-pound plate is a realistic simulation of a plate-loading move:
- Door to rack. Walk straight from the gym entrance to the rack. Note any surface change, threshold, or stored item at ankle height.
- Rack to bench. Walk from the rack’s front opening to the bench’s head end. Can you do it in a straight line? Does any equipment force a step sideways?
- Rack sleeve to plate storage. Stand at the sleeve and step to the plate tree or wall storage. Is the loading triangle clear?
- Bench to dumbbell rack. Walk from the bench’s foot end to the front of the dumbbell rack. Does the path stay at 36 inches wide throughout?
- Cardio to exit. Step off the treadmill or bike (rear zone first, simulating a stumble) and walk toward the door. Is the 78-inch rear zone actually clear, or does something encroach?
After walking each path, mark the approved corridors permanently with colored floor tape. The tape serves two purposes: it makes the paths visible during training, and it marks the boundary beyond which stored equipment must not be left at session end. A 10-second reset after each workout – returning plates, dumbbells, and accessories to their marked storage positions – keeps those paths open every day, not just on the day the room was planned.
Common Layout Mistakes That Block Home Gym Paths
Trips and falls cause 12.5% of fitness facility injuries, with awkward landings and twists accounting for another 12%6. Many of those events trace back to layout decisions made at setup, not to the session that produced the injury. The five mistakes below are the most common sources of blocked paths in home gyms.
1. Placing the rack in a corner. A corner placement feels efficient on paper: two walls handle two sides of the clearance requirement. In practice it eliminates the bail-out zone on those two sides. A failed squat or press in a corner gym leaves the lifter with no safe exit. Rack corners also concentrate loading traffic into a single approach path, which means one misplaced item blocks everything. Place the rack at least 36 inches from both walls on its working sides.
2. Putting cardio equipment in the center of the room. A treadmill in the center of a 200-square-foot gym fragments the space into zones too small to use efficiently. The 78-inch rear zone extends into the middle of the room, blocking the path between the rack and the bench. Cardio belongs at the longest unobstructed wall where its rear zone runs parallel to the wall, not across the room’s active training corridors.
3. Orienting the bench at a 45-degree angle. Diagonal bench placement creates two triangular dead zones on either side of the bench that cannot serve as walkways, storage areas, or training space. Parallel orientation to the nearest wall maximizes usable floor on all four sides and keeps the loading paths to the rack and dumbbell storage straight.
4. Positioning the plate tree on the rack’s wrong side. A plate tree placed behind the rack or on the side opposite the rack’s loading end forces the lifter to carry plates around the rack on every set change. This creates a loading path that crosses the bail-out zone and intersects with the bench-to-rack transition path. Place the plate tree on the same wall as the rack’s loading end, within six feet of the sleeve.
5. Underestimating the treadmill’s rear safety zone. The 78-inch requirement sounds excessive until the math is applied to a real room. In a 12-foot-deep space, a 60-inch treadmill deck plus 78 inches of rear zone requires 138 inches – 11.5 feet – of total depth just for the machine and its safety buffer. That is the entire room depth in a 10×12-foot layout, leaving nothing for any other equipment in that direction. Map the rear zone with tape before positioning the treadmill, not after the machine arrives.
What Clear Home Gym Layout Traffic Flow Looks Like
A home gym layout with clear traffic flow has a specific, practical feel. The markers are concrete: you walk from the door to the rack in three to five steps without routing around anything. You load plates in a straight line from tree to sleeve. The bench-to-squat-rack transition takes under five seconds and involves no lateral detour. You step off the treadmill and reach the door without crossing the center of the room. At the end of a session, every piece of equipment returns to its position in under three minutes because everything has an assigned location that is not in a walking path.
Contrast that with a layout where traffic flow was not planned. The plate tree sits two feet behind the rack. Loading the barbell requires stepping over the bench’s foot end and reaching around the rack upright. The dumbbell rack is against the far wall, so carrying a pair of 60-pound dumbbells to the bench requires crossing the treadmill’s rear zone while the machine runs. Accessories accumulate on the floor because there is no designated storage that does not block something. That layout might function for a session or two, but it degrades faster than a well-planned one and creates conditions where a stumble or a dropped weight has fewer safe outcomes.
The checklist for a layout that passes the traffic-flow test:
- Main walkways measure 36 inches or more at their narrowest point
- The treadmill’s rear 78-inch zone is clear of all stored equipment and furniture
- The plate tree and the rack sleeve are within arm’s reach on the same loading-side wall
- No equipment sits in the corner behind the rack’s uprights
- Accessories are stored off the floor (wall hooks, shelves, or below-knee bins along walls)
- Every transition path has been walked at full speed carrying a weight
If you are working with a tightly constrained space – a 10×12-foot room or a shared garage bay – the same principles apply with tighter tolerances. See 10×12 home gym layout for how to apply these clearance standards in 120 square feet without sacrificing the rack, bench, or a safe loading path.
Frequently Asked Questions
How much clearance do I need around a power rack in a home gym?
NSCA facility design standards recommend 36 inches of walkable clearance on all working sides of a power rack2. That means 36 inches in front for squat walkouts, 36 inches behind as a bail-out zone, and 36 inches on both sides where a lifter steps during a set. In a constrained home gym, the NSCA allows an 18-inch minimum for equipment access paths that see no active training traffic – but the training sides should maintain 36 inches.
What is the minimum walking path width in a home gym?
The NSCA sets 36 inches as the minimum for main training walkways2. For narrow secondary paths used only to access stored equipment – not active training paths – NSCA home gym guidance lowers the floor to 18 inches. OSHA’s general industry standard also cites 18 inches as the absolute minimum for maintenance access walkways5. Use 36 inches as your planning target for any path you walk during a training session.
Where should I put a treadmill in a home gym layout?
Place the treadmill along the longest unobstructed wall in the room, with its rear roller at least 78 inches from the nearest wall, furniture, or equipment behind it. ASTM F2115-12 specifies that 78-inch rear zone as the minimum for emergency dismount clearance3. The treadmill’s sides need at least 19.7 inches each. Map these zones with tape on the floor before the machine is delivered – the rear zone alone may consume more depth than expected in a typical home gym space.
Can I push gym equipment against the wall to save space?
Some equipment can back up to a wall without safety concerns. Dumbbell racks, storage shelves, and stationary bikes can typically sit against a wall as long as the required access aisle in front is maintained. A power rack should not be placed flush against the wall on any side that a lifter uses during a set, because bail-out and walkout clearances would be eliminated. A treadmill must never have its rear roller against a wall – the 78-inch rear zone per ASTM F2115-123 requires clear space, not a surface.
How do I keep walking paths clear after I set up the gym?
Mark the approved paths with colored floor tape and establish a session-end reset habit: every plate returns to the tree, every dumbbell to its tier, every accessory to its hook or shelf. The tape makes the boundaries visible even in low light and makes it obvious when a piece of equipment has migrated into a path during a session. Trips and falls account for 12.5% of fitness facility injuries6 – a 2-minute reset after every session is a direct countermeasure to the most common gym injury mechanism.
Limitations and Edge Cases
- The NSCA clearance figures referenced here come from standards designed for commercial training environments. Home gyms with unusually low ceilings, structural columns, or irregular floor plans may require professional evaluation of whether these clearances can be achieved without compromising another safety variable.
- ASTM F2115-123 is the current treadmill clearance standard as of this writing. Manufacturers may specify greater rear clearances than the standard minimum – when a conflict exists, the greater distance applies.
- This article covers traffic flow within a single-room home gym. Multi-room setups, shared garage bays, and split-level basement configurations introduce additional transition paths not addressed here.
References
- National Safety Council – Sports and Recreational Injuries, Injury Facts, 2024 data year (exercise and exercise equipment category, CPSC NEISS data).
- PTPioneer – NSCA CSCS Chapter 23: Facility Design, Layout, and Organization; and NSCA CPT Chapter 24: Facility and Equipment Layout (home gym spacing guidance). Study guide summaries of NSCA published facility design standards.
- CPH Insurance – Placement of Treadmills: Consult Industry Standards. Citing ASTM F2115-12, Standard Specification for Exercise Treadmills (minimum clearances: 0.5 m each side, 2 m rear).
- The Redwoods Group – Spacing of Fitness Equipment. Risk management analysis of ASTM F2115-12 treadmill clearance requirements.
- U.S. Occupational Safety and Health Administration – Standard Interpretation Letter: Minimum width of a walkway used for maintenance and equipment access (29 CFR 1910.37), March 1982.
- Tuff Wraps – Gym Injury Statistics and Data Trends, 2026. Citing Injury Epidemiology journal research on mechanism of fitness facility injuries.
Conclusion
Traffic flow in a home gym is not an aesthetic consideration – it is a safety and usability variable that determines whether the room works the same on day 365 as it did on setup day. The sequence is fixed: rack first as the traffic anchor, bench along the loading line, cardio at the perimeter with its rear zone mapped before the machine arrives, and storage routed to walls and dead corners. Walk every path with a weight in hand before calling the layout final.
For a broader look at how traffic flow fits into the overall planning process, see the home gym layout overview for context on the full sequence of room-readiness decisions.