
Standard glass mirrors were not designed for an unconditioned garage. Even without direct leaks, surface humidity above 70% is enough to begin corrosion in standard mirror backing, according to building science research,1 and uninsulated garage walls reach those conditions regularly in summer. Before choosing a panel, the Home Gym Lighting and Mirrors overview covers the room-wide planning context. Garage gym mirrors face three specific challenges: temperature cycles stressing edge sealant, chronic high humidity accelerating silver rot, and moving bars and plates near the glass. This guide covers each one in order.
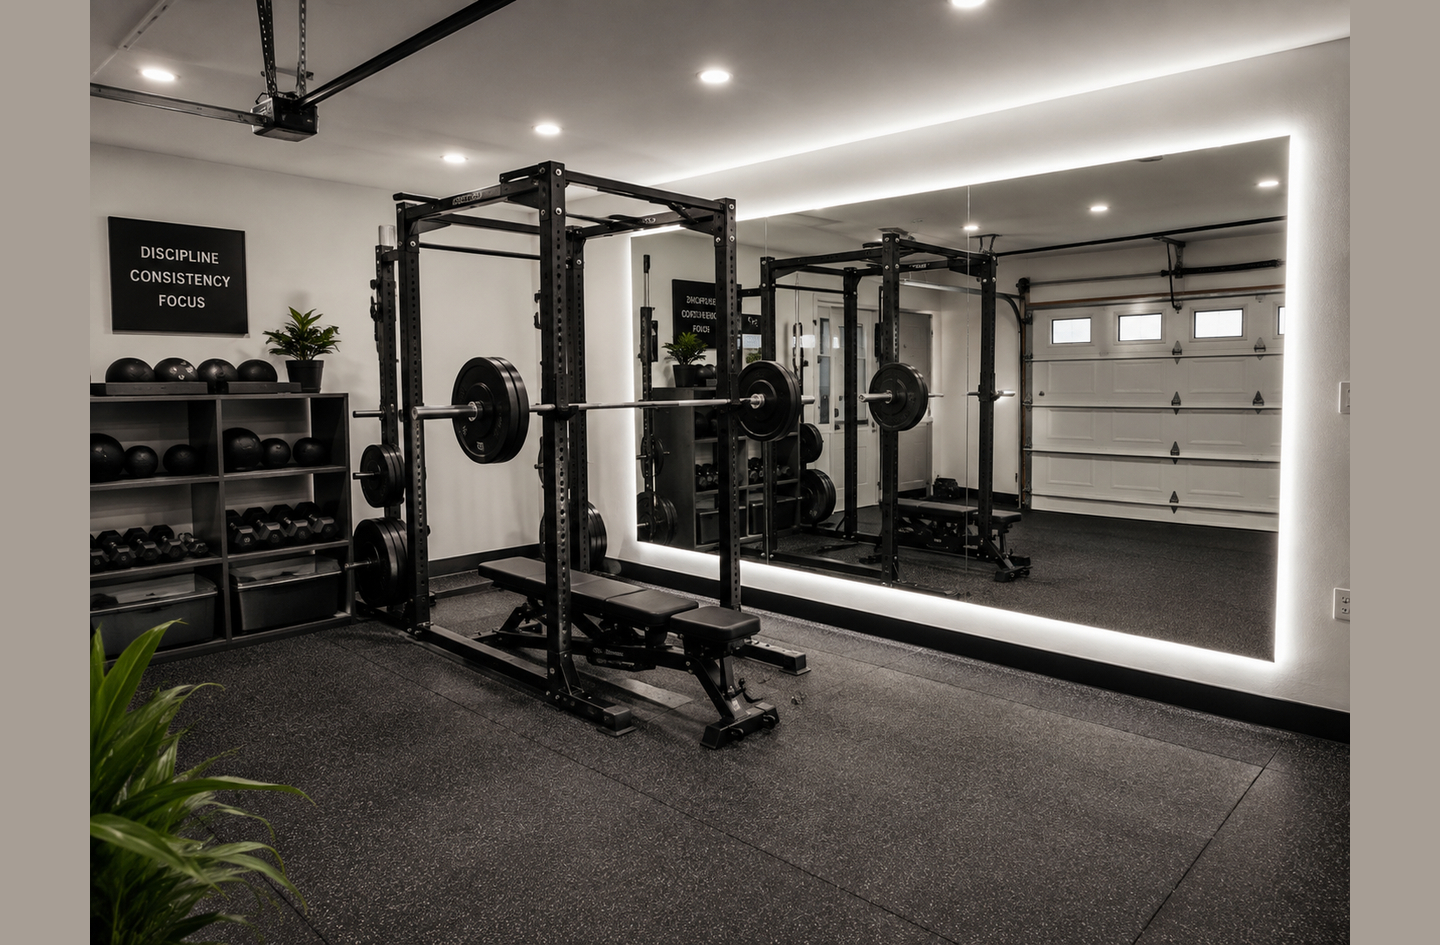
Quick Answer
What do you need to plan garage gym mirrors for a humid, temperature-variable unconditioned space?
Choose 1/4-inch tempered glass rated to ANSI Z97.1 Class A, or shatter-resistant acrylic, which weighs roughly half as much per square foot.3 Keep the mirror face at least 4 feet from the nearest rack upright. Specify copper-free, edge-sealed backing. Seal the bottom track against pooled water after every cleaning session.
Key Takeaways
- Surface humidity above 70% is the threshold for silver backing corrosion; uninsulated garages reach it regularly in summer.1
- Any mirror panel over 9 square feet requires ANSI Z97.1 Class A rating, which demands survival of a 400 ft-lb impact test.2
- A 4-ft by 7-ft acrylic mirror weighs roughly 43 lbs; the same panel in 1/4-inch tempered glass weighs approximately 86 lbs, a practical difference when anchoring into concrete block.
Before You Buy: Why Garage Gym Mirrors Need a Different Plan
A standard residential mirror is built for a climate-controlled interior. The backing manufacturer assumes stable temperature, moderate humidity, and no flying objects. A garage removes every one of those assumptions.
Concrete block walls, uninsulated metal garage doors, and slabs sitting directly on grade create a thermal environment swinging far more than any conditioned room. In summer, a closed garage with a vehicle inside pushes surface temperatures well above what interior rooms experience. In winter, those same surfaces drop toward outdoor ambient, turning every wall into a potential condensation surface the moment a warm training session heats the air inside.
Add a moving barbell and the risk profile shifts completely. A 7-foot bar loaded with plates travels in arcs during overhead press, and re-rack aggression sends heavy loads toward walls with force residential glass was never designed to resist. Planning a garage gym mirror means reading the room for humidity, temperature, wall type, and clearance before selecting any product.
Lighting is feedback, and a mirror failing to condensation, edge blackening, or distortion is not feedback. Get the room right first.
Step 1: Measure the Environment Your Mirror Will Live In
Spend a week observing your garage in its worst-case season before selecting a panel. A week of readings tells you more than any product spec sheet.
Temperature Range
An inexpensive digital thermometer with min-max memory (under $20) logs overnight lows and daily highs over a typical week. Record both figures. The full range tells you how much thermal expansion and contraction the mirror frame, mounting hardware, and panel material will experience across a year. Large temperature swings stress edge sealant and, in acrylic panels, produce visible warping when the panel mounts rigidly with no expansion room.
Garages in cold climates often see surface temperatures on an uninsulated concrete block wall drop below 40°F in late autumn, even when the ambient air inside feels moderate. The mirror backing experiences the surface temperature, not the air temperature. Note both readings, but plan for the wall surface figure.
Relative Humidity and Condensation Risk
A basic hygrometer (roughly $15 to $30) measures relative humidity. Place the sensor near the wall where the mirror will go, not at the center of the room. Wall surfaces in an unconditioned garage consistently register higher humidity than the center air, especially in summer when warm moist air enters and concrete holds a lower temperature.
The condensation threshold is specific: when room air sits at 70 degrees Fahrenheit and 40% relative humidity, any surface falling below 45°F will collect condensation.1 In a garage, wall surfaces drop below 45°F regularly in transitional seasons. Building science research identifies surface humidity above 70% as the trigger for corrosion, decay, and mold growth at those surfaces.1
If your hygrometer shows sustained readings above 60% during summer, plan for humidity as a permanent condition, not a seasonal anomaly.
Wall Type and Moisture Wicking
Concrete block and poured concrete walls wick moisture from the slab and surrounding soil. A mirror mounted flush against a cold concrete block face traps a moisture layer between the backing and the masonry. This trapped layer is precisely the condition accelerating silver rot at the glass edge, from two directions simultaneously.
Framed drywall over concrete block, or a wood-stud wall, changes the picture meaningfully. A framed wall creates an air gap, allows for proper adhesive contact, and buffers temperature swings at the mounting surface. If your garage is bare concrete block with no framed wall, the installation approach changes entirely. The sibling article on gym mirror installation for drywall, studs, block, and concrete covers the wall-type comparison in detail.
Step 2: Choose Between Tempered Glass and Acrylic
The decision between tempered glass and acrylic is not primarily about optical quality. At most training distances, both materials produce a usable reflection. The decision is about weight, shattering behavior, and how each material responds to your garage’s humidity profile.
Why Standard Annealed Glass Is Wrong for a Garage
Standard annealed glass is the base glass used in most residential mirrors: float glass without any thermal or chemical strengthening treatment. When annealed glass breaks, it fractures into large, sharp shards. In a garage gym with a rack and a barbell, the shattering pattern creates a serious hazard. Annealed glass carries no safety glazing rating and fails the ANSI Z97.1 threshold, making it inappropriate for any location where human contact with the glass is foreseeable.
Residential mirror suppliers frequently sell annealed panels at competitive prices. In a conditioned bedroom or living room, the risk is lower. In a garage gym, an unrated panel is a hazard from installation day.
Tempered Glass: What It Does and What It Weighs
Tempered glass is a type of safety glass processed by controlled thermal or chemical treatments to increase its strength, causing it to crumble into small granular chunks rather than splintering into jagged shards when broken. At 1/4-inch thickness, tempered glass weighs approximately 3.07 pounds per square foot.4 A 48″x84″ panel (4 ft by 7 ft) totals 28 square feet and approximately 86 lbs fully mounted.
Anchoring 86 lbs of glass into concrete block requires more anchor points and higher-rated hardware than anchoring 43 lbs of acrylic. Into masonry, anchor pull-out strength depends on block type, block condition, and the specific anchor rated for the substrate. If you are uncertain about anchor capacity for your specific wall, consult a licensed contractor before installing a heavy glass panel. Load calculation for your specific wall belongs with a qualified professional, not a general-purpose guide.
Acrylic: Half the Weight, Shatter-Resistant
Acrylic mirror sheets are half the weight of glass and 17 times stronger than glass under impact loads.3 When acrylic fails under extreme impact, it cracks without producing the hazardous fragments glass produces. For a masonry-walled garage where anchor load is a practical constraint, acrylic’s weight advantage often tips the decision.
The tradeoff is moisture absorption at the surface. Acrylic absorbs moisture in outdoor or high-humidity environments, increasing the risk of slight surface clouding over time. In a garage gym, keep the panel away from direct water contact during cleaning, choose UV-stabilized acrylic from a supplier specifying it for interior high-humidity use, and seal the bottom edge to prevent moisture from pooling at the frame.
For planning panel size and coverage before committing to a material and size, the sibling article on gym mirror wall planning (panel size, coverage, and sightlines) covers how to determine the mirror area needed from the actual training position.
Step 3: Apply the Right Safety Standard for Your Panel Size
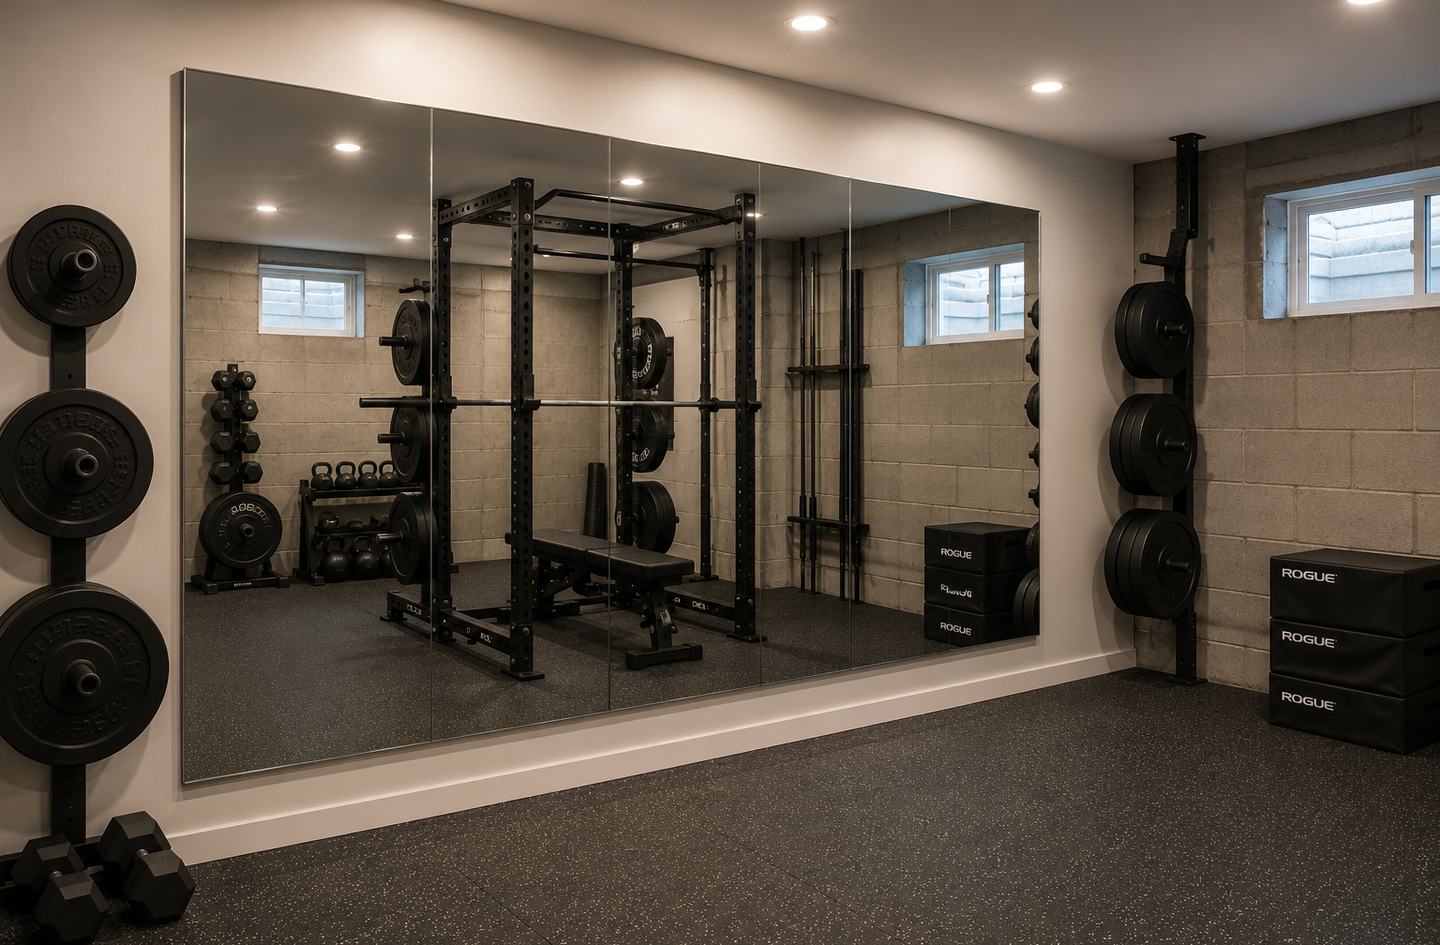
Mirror safety rating is not optional in a space where a person and glass occupy the same room. ANSI Z97.1 is the American National Standard for safety glazing materials, which defines impact resistance classes for glass and acrylic panels used in buildings and other applications where human contact with glass is foreseeable. It aligns with CPSC’s 16 CFR Part 1201, the federal regulation governing architectural glazing.
| Material | Weight at 1/4 in | Safety Class | Edge Corrosion Risk | Best Garage Use |
|---|---|---|---|---|
| Standard annealed glass | 3.07 lb/sq ft4 | Not ANSI-rated | High (sharp shards on failure) | Not recommended |
| Tempered glass (1/4 in) | 3.07 lb/sq ft4 | ANSI Z97.1 Class A (>9 sq ft) | Medium, reduced with edge seal | Best with framed or drywall surface |
| Acrylic mirror (1/4 in) | ~1.54 lb/sq ft3 | 17x glass impact strength3 | Low (seal edges from pooling) | Best for masonry walls with anchor limits |
Understanding ANSI Z97.1 Impact Classes
Class B (CPSC Category I) applies to panels up to 9 square feet. Testing uses a 100-pound lead-shot bag dropped from 18 inches, producing approximately 150 foot-pounds of force.2 Class A (CPSC Category II) applies to panels over 9 square feet. The drop height rises to 48 inches, producing approximately 400 foot-pounds of force.2
A typical 4-ft by 7-ft gym mirror (28 sq ft) requires Class A rating. A small 24″x36″ accent panel (6 sq ft) meets the threshold for Class B. Know the panel size before ordering, because the safety class follows directly from the size.
Reading the Safety Label
Every compliant safety glazing panel carries a permanent label at the corner. The label identifies the manufacturer, the applicable standard (ANSI Z97.1 and/or CPSC 16 CFR Part 1201), the class (Class A or Class B), and the glazing type (tempered, laminated, or other). Acrylic panels from reputable suppliers carry equivalent ratings, though the label language differs from glass.
If a panel arrives without a safety label, treat it as non-compliant until you obtain written certification from the supplier. Asking for the safety class at the time of order prevents this problem. Do not install an unlabeled panel in a training space.
What Class A Means in Practice
A Class A-rated 28 sq ft tempered glass panel survives a 400 ft-lb impact without producing hazardous fragments. For context: a 45 lb plate dropped from waist height releases roughly 45 ft-lb at contact. The 400 ft-lb rating is a baseline distinguishing safety glass from annealed glass in a high-energy environment, not a guarantee against breakage from a direct barbell strike at full loading.
The safety rating establishes the floor. Clearance planning determines whether the floor is sufficient for the training layout in your specific garage.
Step 4: Plan Clearance from Moving Equipment
The mirror goes where it reads the training stance. For rack-based work, the position is directly in front of the rack or along the dumbbell wall. Clearance planning ensures the mirror never ends up within reach of equipment in motion.
The 4-Foot Minimum
Place the mirror face at least 4 feet from the nearest rack upright or the outermost point of any equipment moving toward the wall. An Olympic barbell measures 7.2 feet long. Loaded collar-to-collar, it extends roughly 20 inches beyond each sleeve end. Racking aggression, failed lifts, and bar rollout all send the bar toward the nearest wall surface. Four feet of clearance between rack uprights and the mirror face prevents contact from a normally racked bar.
Four feet is the minimum. Six feet is the more comfortable clearance for high-frequency overhead movements, where the bar path during press and push press swings toward the face rather than directly upward.
Mapping the Impact Zone Before You Install
Walk through your heaviest movements with an unloaded bar. Note where the bar path would intersect a mirror face at each point in the lift. Squat: the bar sits behind the neck and does not reach the face mirror. Bench press: the bar travels directly forward of the lifter, stopping at chest height. Overhead press: the bar clears the head and reaches full extension above the crown. Deadlift: the bar ends move laterally as the lifter steps to the bar and steps back.
Sketch the impact zone on a rough floor plan before finalizing the wall. For a face mirror at a rack, the bench press position puts equipment closest to the glass. For a side mirror at a deadlift platform, the bar ends are the relevant dimension.
Where Mirror Placement Changes the Training Layout
If the only viable wall sits within 4 feet of the rack, move the rack first. A mirror receiving a hit from a loaded bar is a safety failure regardless of its impact rating. The rack is a movable equipment variable. The mirror, once anchored, is fixed to the wall. Start with mirror clearance and work the rack placement backward from there.
In a small garage where 4 feet is not available on any direct face wall, a side-wall placement with a partial sightline still shows the lateral and sagittal planes of the primary lifts from a safer offset position.
Step 5: Protect the Backing and Seal the Edges
The mirror’s visible surface is the silver layer, sitting between the glass and a protective paint backing. In a garage, edges are the entry point for moisture and the bottom track is where pooled water collects.
What Silver Rot Looks Like and When It Starts
Silver rot, also called desilvering, is the progressive corrosion of the metallic silver layer bonded to the back of a glass mirror, beginning at unsealed edges where moisture and oxygen reach the silver substrate. Visually, the damage appears as a dark or brown fringe along the glass edge, growing inward over months or years.
Standard residential mirrors resist ASTM B117 salt-spray testing for under 150 hours before corrosion appears.5 Commercial-grade copper-free mirrors are specified to resist the same test for 480 hours or more.5 In a humid garage summer, cumulative surface condensation across a season can approach or exceed what standard backing was tested to resist, making the specification of commercial-grade backing a practical decision for a garage installation.
“If the air in the middle of a room is 70 degrees at a relative humidity of 40 percent, any surface below 45 degrees will be able to condense water.”
Building Science Corporation, Research Report RR-0203: Relative Humidity1
In a garage, 40% relative humidity is the low end of summer conditions in many climates, and wall surface temperatures below 45°F occur in every transitional season. The condensation mechanism described in building science research applies directly to a garage gym mirror face, especially on uninsulated concrete block.
Specifying Copper-Free Commercial-Grade Backing
Standard mirror silvering deposits a copper layer over the silver to protect it during manufacturing. Copper is the primary pathway for galvanic corrosion when moisture and airborne contaminants reach the backing.6 Copper-free mirror silvering removes this pathway. At the time of order, specify “copper-free silvering” and “edge-sealed backing.” These are not premium add-ons for a garage installation. They are the baseline specification for high-humidity conditions.
Also specify safety backing film. Safety film on the rear face holds fragments together if the glass breaks, reducing the hazard of a failing panel in a training environment. Safety film differs from the safety glazing classification: Class A tempered glass crumbles on impact, while a laminated or film-backed mirror holds together as a single unit. Both reduce hazard through different mechanisms, and both belong on a garage gym glass mirror.
Edge Sealing and the Bottom Track Trap
The most common source of mirror edge damage in gym installations is pooled water in the bottom track. Cleaning the mirror face sends water running down the glass and collecting in the channel or clip at the bottom. Water pooling against an unsealed glass edge enters the backing over weeks and months.
Two fixes prevent this: use a J-channel or mitered clip at the bottom shedding water rather than trapping it, and seal the bottom glass edge with clear silicone rated for glass contact before installation. After installation, drying the bottom track as part of routine cleaning adds fifteen seconds to each session. The silicone bead takes ten minutes to apply once and costs less than the replacement panel it prevents.
Edge sealing is the highest-leverage maintenance decision in a garage gym mirror installation. The cost is minimal. The alternative is a corroded panel requiring full replacement.
Step 6: Inspect and Maintain After Installation
A garage gym mirror requires periodic inspection, not only cleaning. The inspection looks for early edge corrosion, frame sealant gaps, and signs of moisture working behind the panel.
The Six-Month Check
At the six-month mark after installation, examine the edges carefully under good light. Look for any dark or brown discoloration forming along the glass edge. If the edge is clean and the bottom track is dry, the installation is performing well. If discoloration has appeared, identify the moisture source before the condition progresses.
Common sources include: pooled water in the bottom track from cleaning, a cracked silicone bead at the top edge, or a hardware fitting holding moisture against the glass. Early-stage desilvering stays at the edge. Mid-stage corrosion travels 2 to 3 inches inward and distorts the reflective surface visibly. Late-stage corrosion is a replacement case. Catching the problem at six months keeps the fix small.
Cleaning Protocol for Backing Longevity
Apply glass cleaner to the cloth, not directly onto the mirror face. Spraying directly sends cleaner into edge gaps. Wipe from top to bottom, and dry the bottom track after each session. Avoid ammonia-based cleaners on mirrors with safety backing film; ammonia degrades polyester film over time. Use isopropyl alcohol at 70% concentration or a pH-neutral glass cleaner as alternatives.
For acrylic panels, use only cleaners labeled as safe for acrylic. Standard glass cleaners contain solvents clouding acrylic surfaces permanently. A microfiber cloth dampened with a diluted dish soap solution is the safe default. Label the cleaning supplies on installation day so the information is available to anyone maintaining the space.
When to Replace Rather Than Repair
Edge desilvering traveling more than 2 inches inward is a replacement case, not a repair case. Resilvering is theoretically possible but rarely cost-effective for the panel sizes used in home gyms. A replacement panel of the same specification costs less than a resilvering service in most markets.
If the glass has cracked or the acrylic has developed a deep scratch distorting the reflection, replace the panel. A distorted mirror delivers inaccurate movement feedback. Training form checked against a warped or corroded reflection produces unreliable data, which is worse than training without a mirror entirely.
Common Mistakes in Garage Gym Mirror Planning
Most planning errors in garage gym mirrors follow a short list. They appear at first installation and require a fix or a full replacement before the mirror functions as intended.
Ordering a panel without checking the ANSI class. Residential mirror suppliers frequently sell annealed glass at competitive prices. In a garage gym, an unrated panel is a hazard in any zone where equipment or a person contacts the glass during a failed lift. Verify the safety class before purchase, not after delivery. The safety label ships with the panel; if it is absent, the panel is presumed non-compliant.
Mounting directly against concrete block. Flush-mounting a glass panel against a cold, moisture-wicking masonry surface traps a moisture layer between the backing and the wall. The result is accelerated edge corrosion from two directions. Use standoffs, a mirror channel, or a framed surface section to create a ventilated air gap behind the panel.
Placing the mirror too close to the rack. Four feet from rack upright to mirror face is the working minimum. A rack positioned closer because the space “almost works” will produce a mirror contact event eventually. It is not a question of skill level. It is physics: bar rollout, re-rack force, and failed-lift trajectories move the loaded bar toward the nearest fixed surface at unpredictable angles.
Using standard glass cleaner on acrylic. Many gym owners install acrylic for weight and safety benefits, then clean the panel with an ammonia-based spray and watch the surface cloud within six months. The cleaning protocol is part of the product specification. Decide it on installation day and label the supplies accordingly.
Skipping the bottom edge seal. The J-channel or clip at the bottom of a floor-to-ceiling mirror installation collects cleaning water. Without a silicone edge seal on the glass before installation, pooled water reaches the silver backing. The first visible sign appears six to twelve months later as a dark fringe at the base of the panel, spreading inward from the bottom edge. Silicone edge sealant applied before installation prevents this entirely.
Frequently Asked Questions
What is the minimum safe distance between a barbell rack and a gym mirror?
Place the mirror face at least 4 feet from the nearest rack upright or collar position. This clearance prevents contact from a normally racked Olympic bar. For overhead press and push press movements, where the bar path swings toward the face rather than directly overhead, 6 feet provides more comfortable working room. Measure from the mirror face to the outermost point of equipment at its maximum travel position, not at its resting position.
Is acrylic or tempered glass better for a humid garage gym?
Acrylic has two practical advantages in a humid garage: it weighs roughly half as much per square foot as 1/4-inch tempered glass (reducing anchor load on masonry), and it does not experience silver backing corrosion because it is not silvered glass. The tradeoff is surface sensitivity to ammonia-based cleaners and potential slight clouding in sustained high-humidity environments over years. Tempered glass with copper-free, edge-sealed backing performs well in high-humidity garages when the backing specification is confirmed and the bottom edge is sealed before installation. Both work; acrylic is the lower-risk choice for masonry walls where anchor load is the binding constraint.
How do I know if my garage gym mirror needs ANSI Class A or Class B?
The threshold is 9 square feet. Any panel over 9 square feet (for example, a 36-inch by 48-inch panel equals exactly 12 square feet) requires ANSI Z97.1 Class A certification and must survive a 400 ft-lb impact test. Any panel at or under 9 square feet needs Class B, tested at 150 ft-lb. A typical 4 ft by 7 ft gym mirror (28 sq ft) requires Class A. Verify the class on the permanent label bonded to the panel corner before installation. A panel without a label should not be installed in a training space.
How long does garage gym mirror backing last before silver rot appears?
Standard residential mirror backing fails ASTM B117 salt-spray testing in under 150 hours, which represents an accelerated simulation of corrosive atmospheric exposure.5 Commercial-grade copper-free backing is rated for 480 hours or more under the same test.5 Real-world longevity depends heavily on actual humidity levels, edge sealing quality, and cleaning practices. In a consistently humid unconditioned garage, standard backing may show edge blackening within one to two years. Copper-free backing with proper edge sealing routinely lasts ten or more years in commercial gym environments. The specification decision at purchase time determines the likely service life.
Do I need a contractor to install a large gym mirror on concrete block?
For panels over 9 square feet (Class A threshold) anchored into concrete block, consulting a licensed contractor is the recommended step before installation. Anchor pull-out strength into concrete block varies significantly by block type, block condition, wall thickness, and the specific anchor selected. Calculating anchor capacity for your specific wall requires a professional assessment, not a general specification from a guide. The decision to self-install or use a professional belongs to the person doing the work, not a written guide. When the wall type, anchor selection, or panel size creates any uncertainty about structural capacity, the correct response is a qualified professional assessment.
Scope and Limitations
This guide covers planning decisions (environment assessment, material selection, safety standards, clearance, backing specification, and maintenance) for garage gym mirrors in unconditioned residential spaces. Structural anchor calculations for specific wall types and anchor specifications are not within scope. Load-bearing assessments for concrete block, poured concrete, or other masonry substrates require a licensed contractor or structural engineer with knowledge of the specific site conditions. Electrical considerations for mirrors with integrated LED components are not addressed here; consult a licensed electrician for any wiring work.
The ANSI Z97.1 impact class thresholds and ASTM B117 salt-spray test hour figures cited in this article reflect published standards and supplier specifications as of the publication date. Building codes and product standards change over time; verify the current version of ANSI Z97.1 and CPSC 16 CFR Part 1201 with the relevant authority when making code-compliance decisions.
References
- Building Science Corporation. “RR-0203: Relative Humidity.” Building Science Corporation Research Reports. Accessed September 19, 2026. Source confirms condensation triggers at surface temperatures below 45°F when ambient air is 70°F / 40% RH, and identifies surface humidity above 70% as the corrosion and mold-growth threshold.
- American National Standards Institute. “ANSI Z97.1: Safety Glazing Materials Used in Buildings: Safety Performance Specifications and Methods of Test.” Aligned with CPSC 16 CFR Part 1201. Class A (panels over 9 sq ft): 400 ft-lb impact test (100-lb bag, 48-in drop). Class B (panels up to 9 sq ft): 150 ft-lb impact test (100-lb bag, 18-in drop).
- Acrylic mirror product specifications. Multiple suppliers (including Plaskolite and Acme Plastics) state that 1/4-inch acrylic mirror sheet is approximately half the weight of equivalent glass and 17 times more resistant to impact under ASTM D256 testing. Weight figure for 1/4-in acrylic: approximately 1.54 lb/sq ft; impact resistance: 17x glass.
- Glass Association of North America. Standard glass weight tables. 1/4-inch (6 mm) glass: 3.07 lb/sq ft (15.0 kg/m²). Used for load calculation for a 28 sq ft panel: 28 × 3.07 = 86 lbs. Same weight applies to standard annealed and tempered glass at identical thickness.
- Commercial mirror backing specifications. Suppliers specifying copper-free silver mirror backing (including JYD Mirror product documentation) publish ASTM B117 salt-spray test ratings of 480+ hours for commercial-grade copper-free backing vs. under 150 hours for standard residential backing. ASTM B117 is the standard test method for salt-spray (fog) testing of metallic coatings.
- Glass and mirror industry technical documentation. Standard mirror silvering applies a copper protective layer over the silver backing. Copper is the primary site for galvanic corrosion when moisture and atmospheric contaminants reach the backing. Copper-free mirror silvering eliminates this pathway and is the recommended specification for high-humidity environments.
Next Steps
Choosing a garage gym mirror without reading the room first produces the most common failures in this space: standard backing that corrodes within two years, a panel installed flush against masonry that accelerates the corrosion it was supposed to resist, and a rack positioned close enough to the mirror that the first heavy re-rack creates a safety event.
The sequence in this guide puts environment first because the planning follows from the room. Measure humidity and temperature range, choose material based on wall type and anchor capacity, confirm the safety class for the panel size, build in clearance from equipment before finalizing the rack position, specify copper-free backing with edge sealing at the time of order, and plan the maintenance protocol before installation day. In that order, the room governs the mirror, not the other way around.
For the next steps in mirror selection and installation, the sibling articles cover the two adjacent decisions this guide does not: mirror wall planning for panel size, coverage, and sightlines (how much mirror the training position requires), and gym mirror installation for drywall, studs, block, and concrete (how the mounting approach changes by wall type). The Home Gym Lighting and Mirrors planning hub has the full room-first overview tying both guides together.